Notifications
You can use only one type of notification from the following ones:
A pay service
Please follow this link for more information on how to setup a pushover notification service
A free service
Please follow this link for more information on how to setup a line notification service
Email using SMTP and HTTPS
Please follow this link for more information on how to setup a email notification service
A free service up to 5 applets
Please follow this link for more information on how to setup a pushover iftt service
A free service
Please follow this link for more information on how to setup a telegram notification service
The notification will also be sent to the WebUi
How to send message ?
Just add following command in your slicer’s end script, or manualy on your GCODE file:
[ESP600]msg pwd=<admin password>
How to ask printer to send command from file played from SD ?
-
on Repetier
M118 [ESP600]msg
-
on Marlin
M118 P0 [ESP600]msg
-
on Smoothieware
echo [ESP600]msg
Subsections of Notifications
Pushover Notification
Pushover is paid service
Considering you have pushover account (even just trial) and you already installed pushover client on you phone/PC:
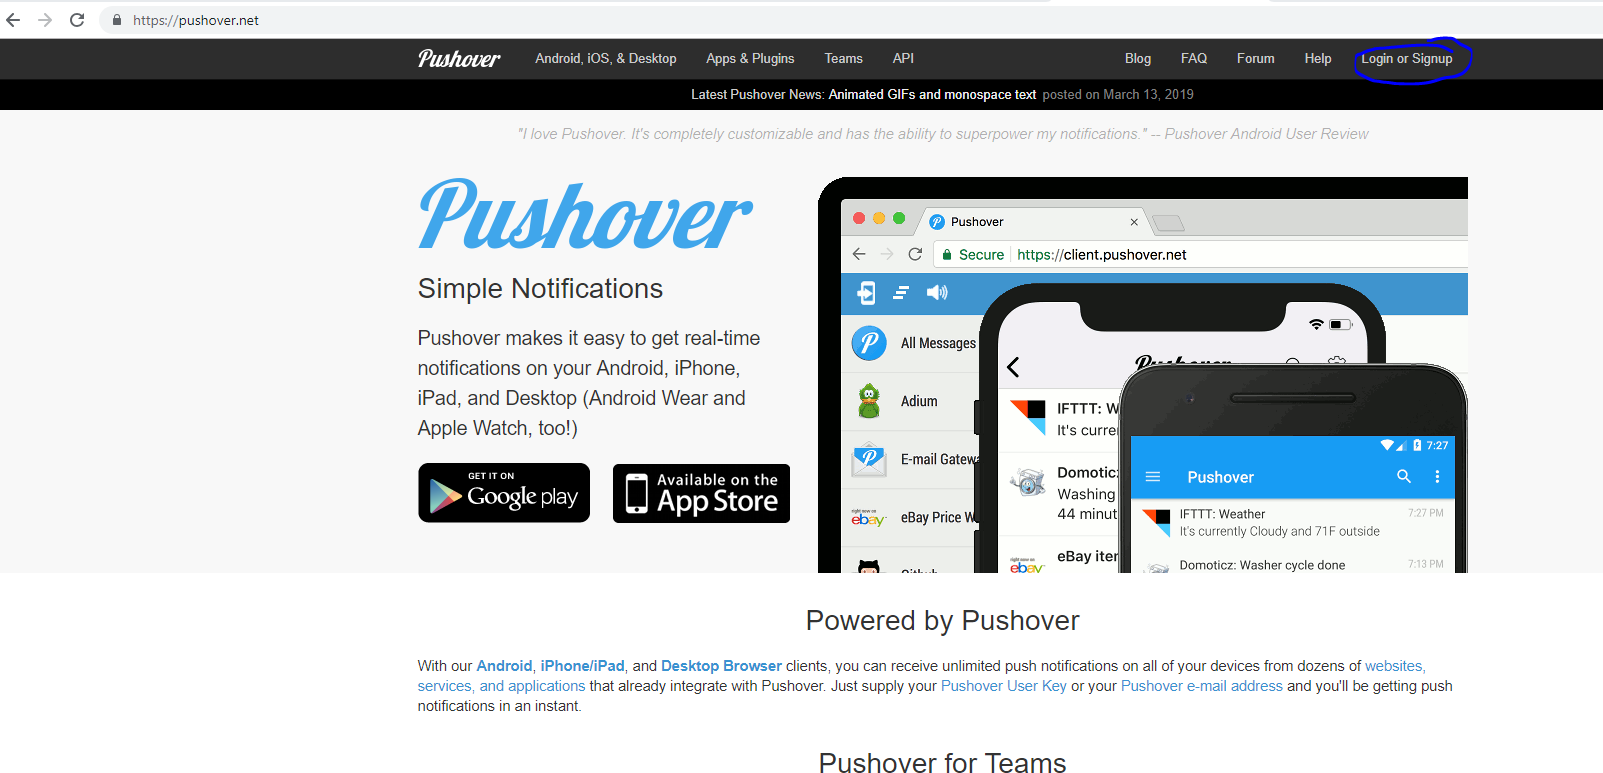
1 - Go to https://pushover.net/ and connect with email and password
2 - Once connected you will be able to get the token 1, the user token
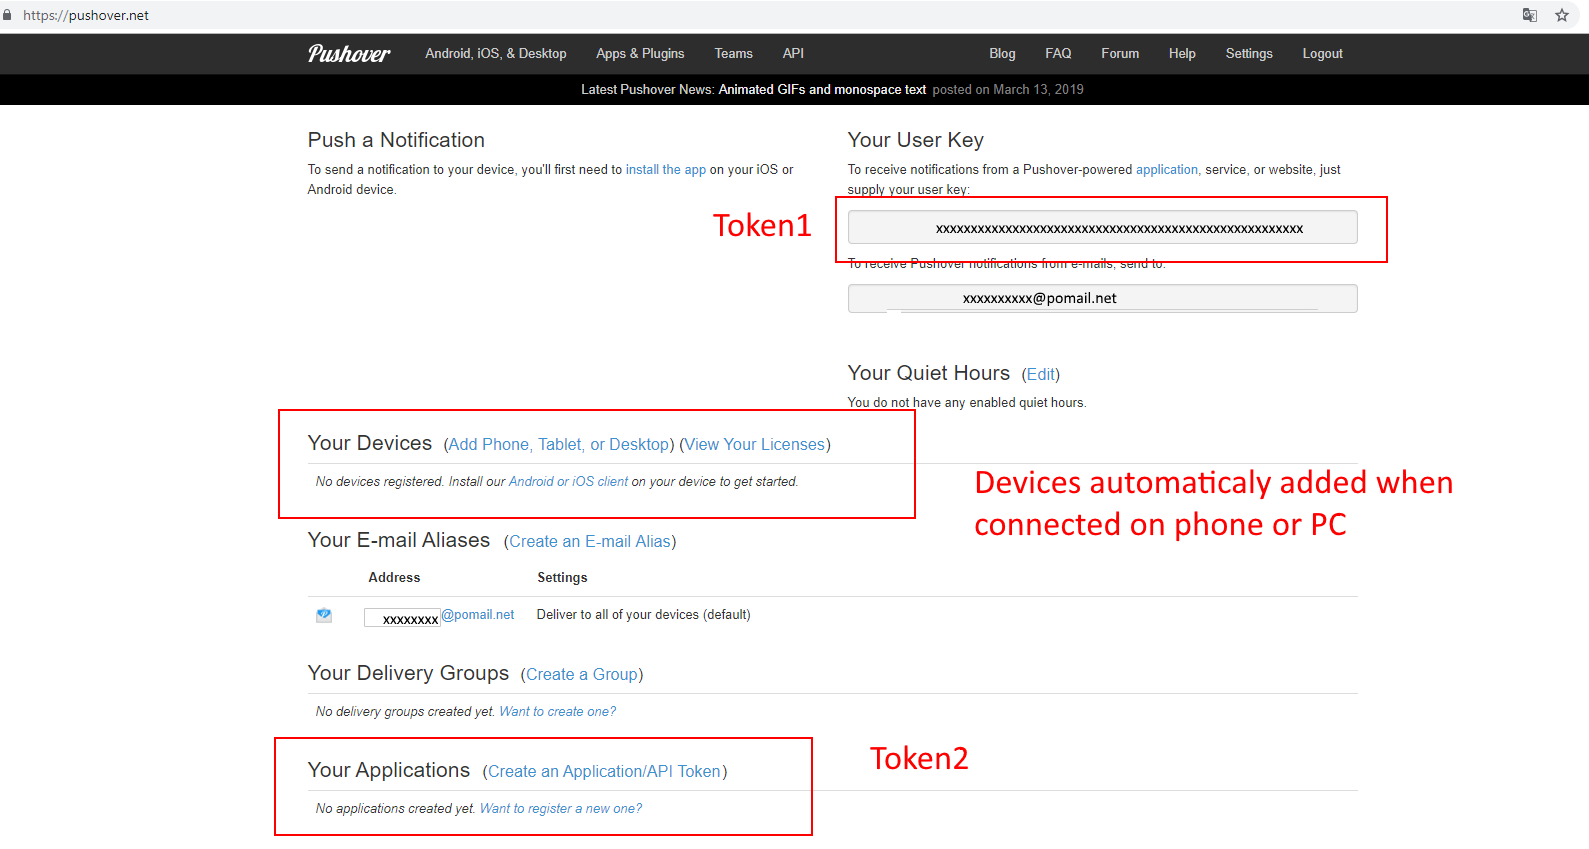
3 - You also need to generate an application token, which is the token 2
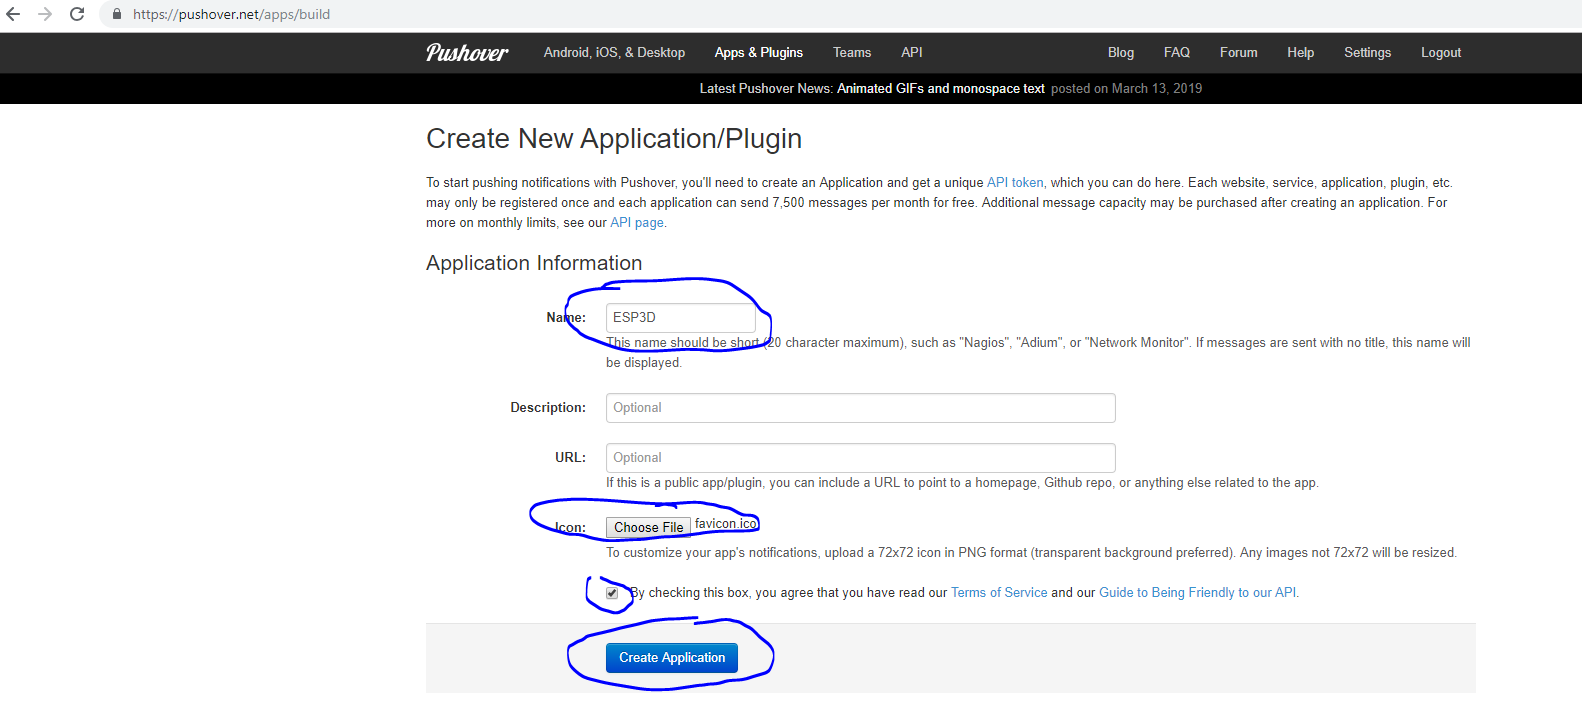
4 - The token 2 generation:
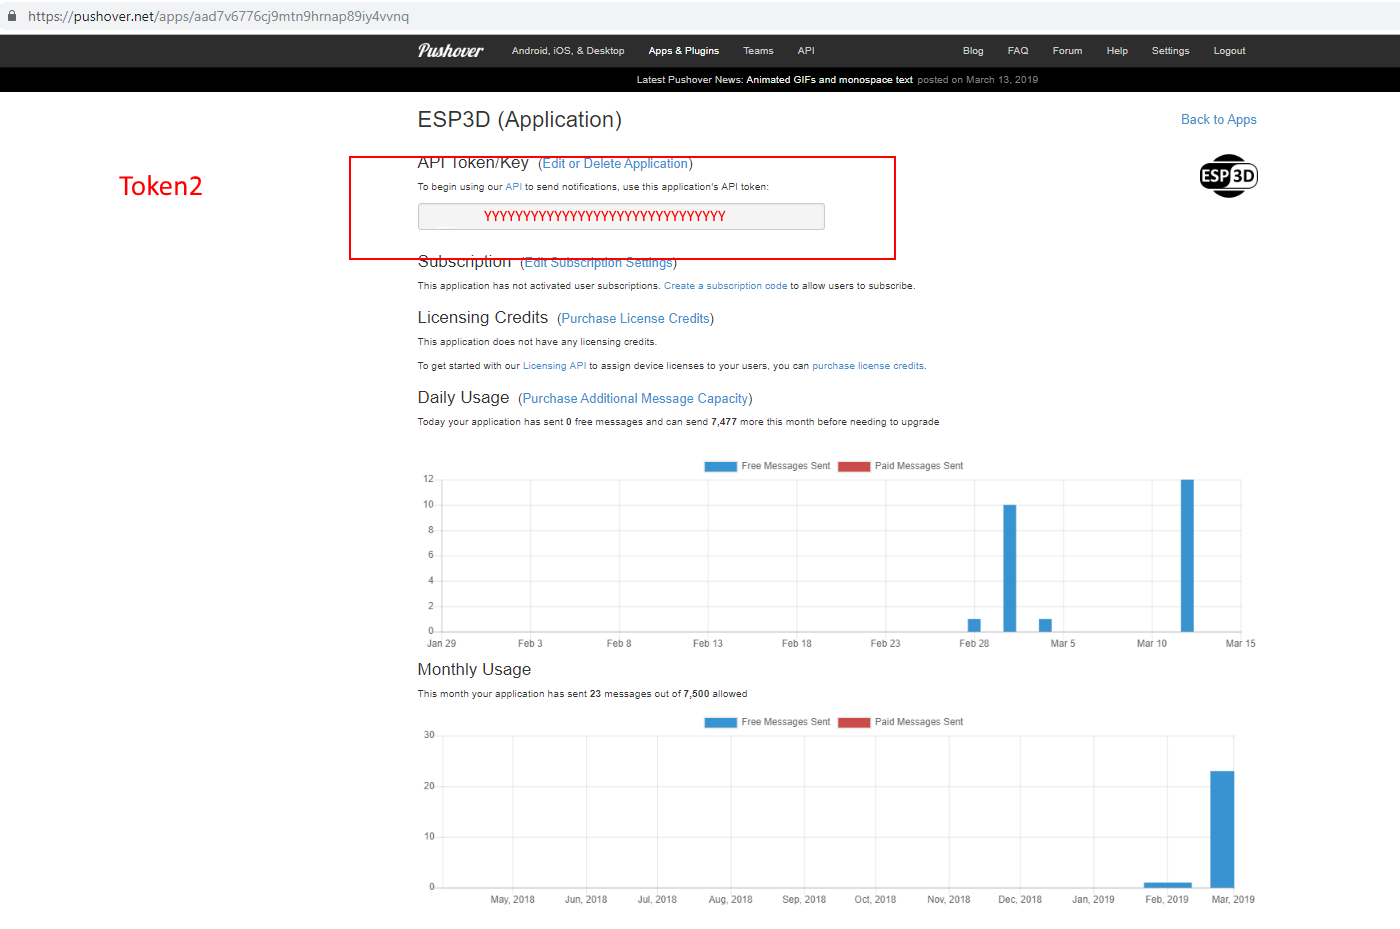
5 - Save the generate token 1 and token 2 in ESP3D, and set PUSHOVER as notification supplier
[ESP610]type=PUSHOVER T1=xxxxxxxxxxxxxxxxxx T2=yyyyyyyyyyyyyyyyy
6 - type [ESP610] to verify (T1 and T2 won’t be displayed)
7 - Try to send message:
[ESP600]Hi there, test from ESP3D
Line Notification
Line is free service
Considering you have line account and you already installed line on you phone/PC:
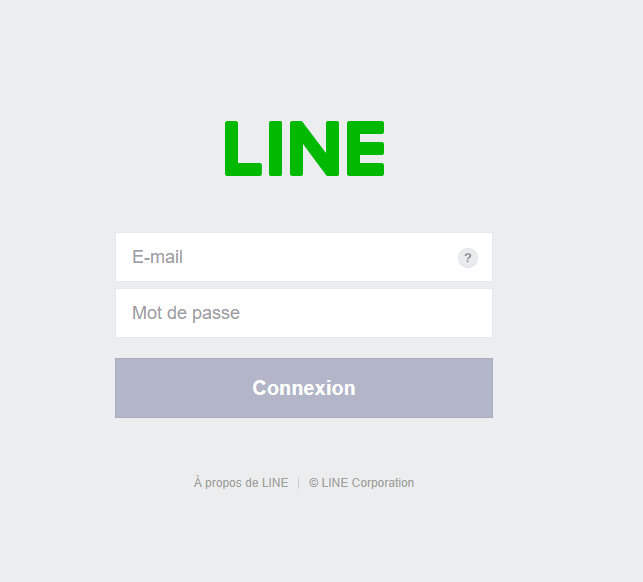
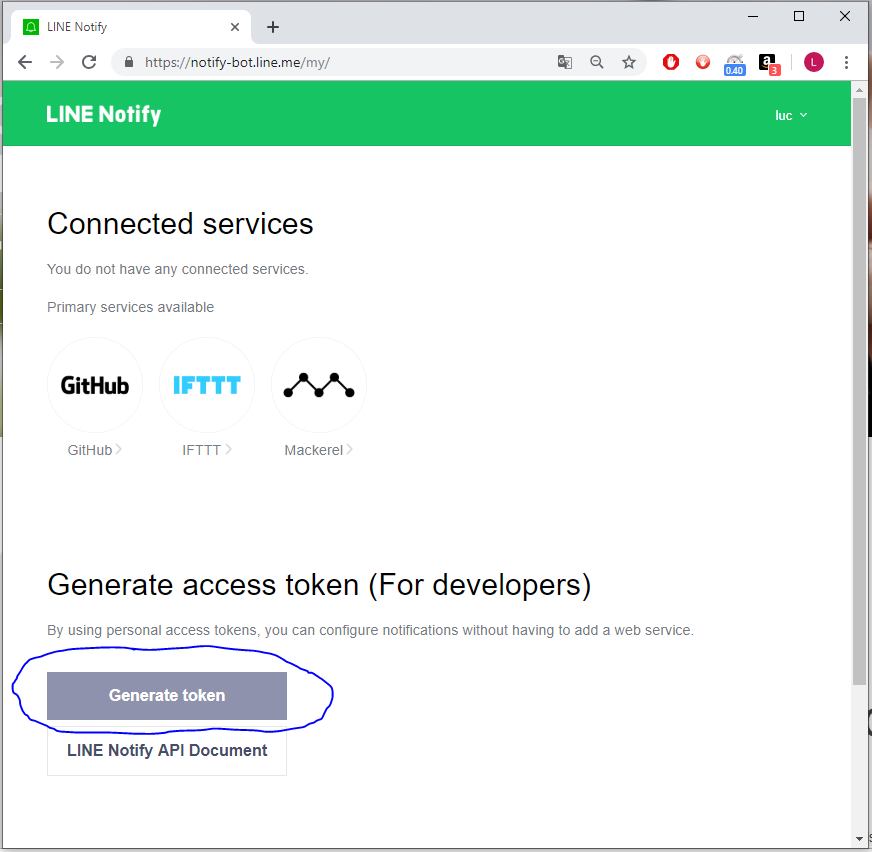
1 - Go to https://notify-bot.line.me/my/ and connect with email and password
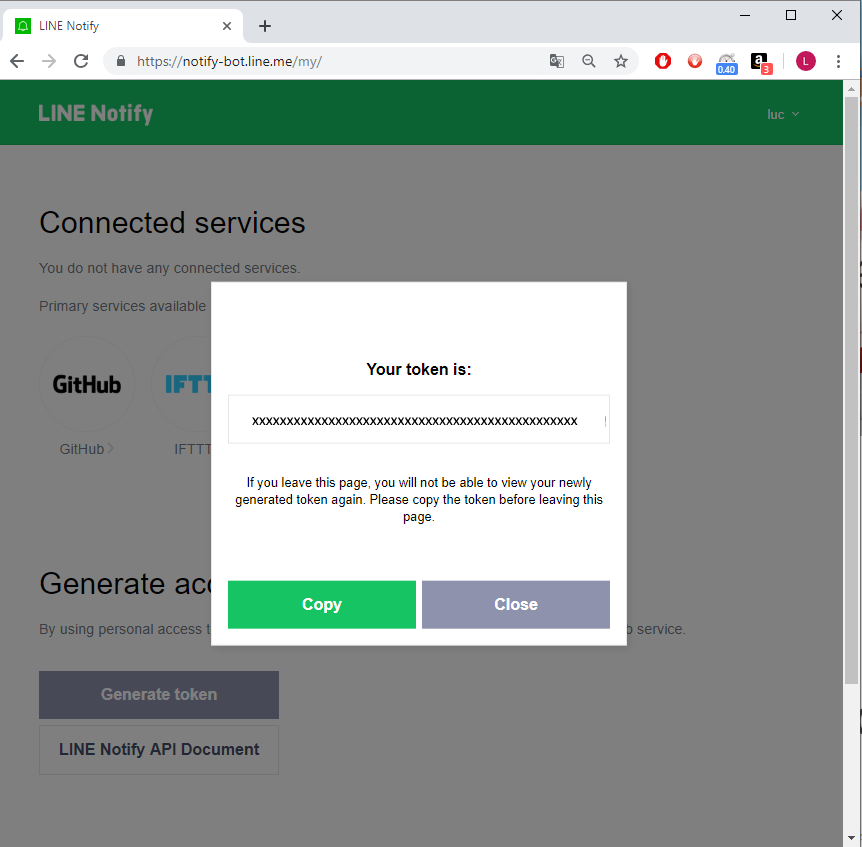
2 - Once connected you will be able to generate token
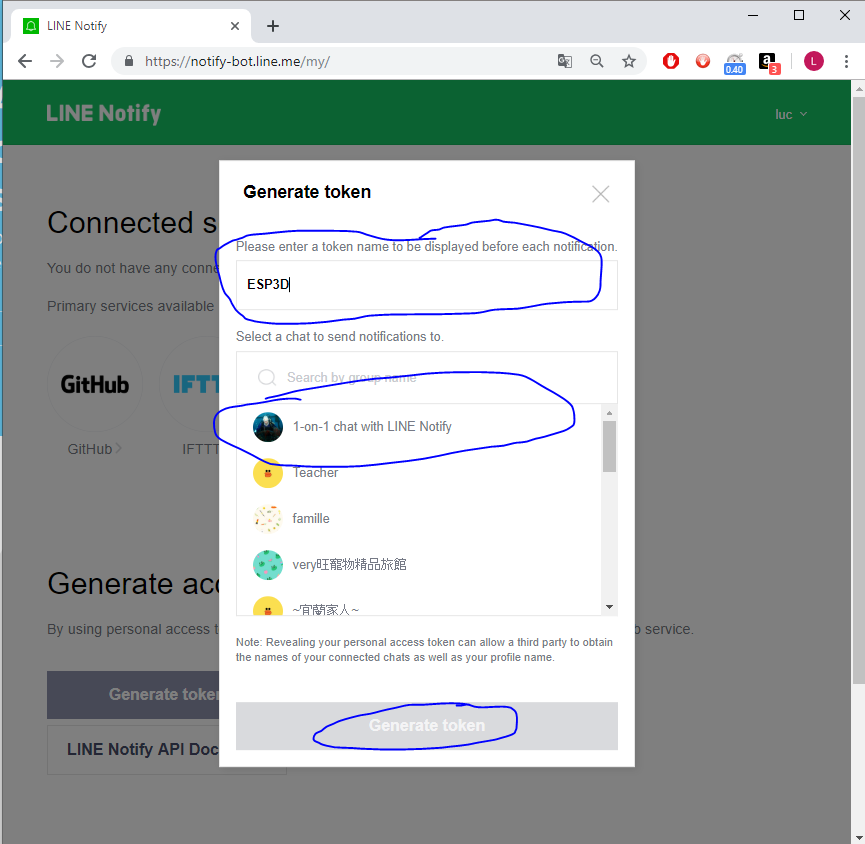
3 - Type token name on top, select recipient(s) and press Generate token
4 - Once token is created you need to copy it
5 - You can create as many tokens you want, and delete the ones you do not need
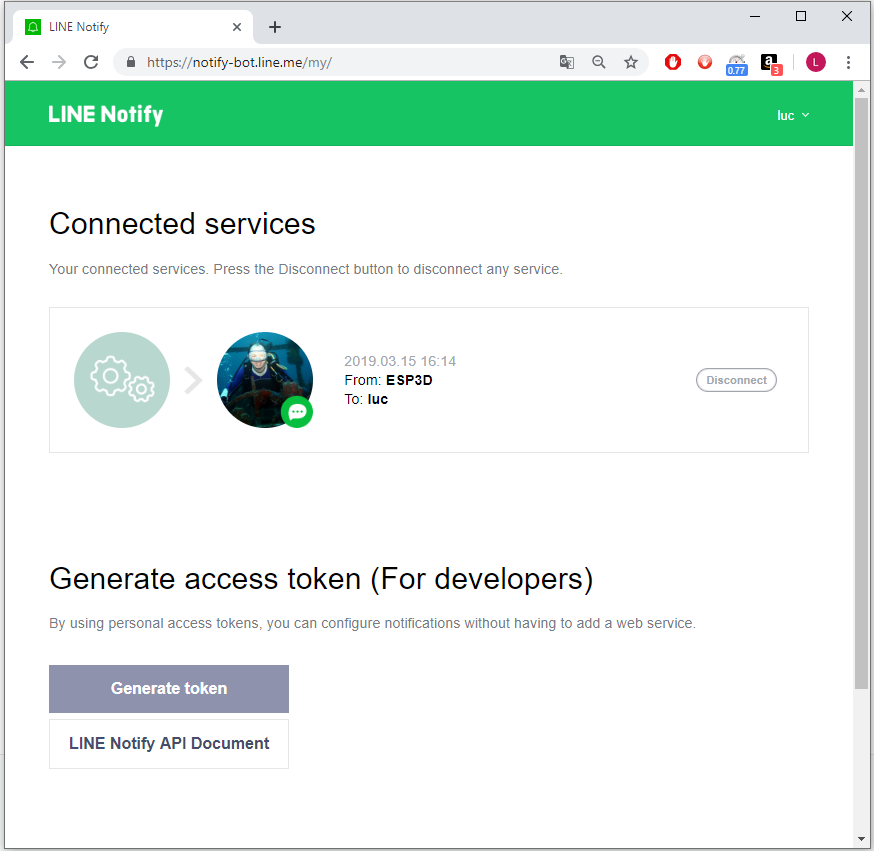
6 - Save the generate token in ESP3D, and set LINE as notification supplier
[ESP610]type=LINE T1=xxxxxxxxxxxxxxxxxx
7 - type [ESP610] to verify (T1 won’t be displayed)
8 - Try to send message:
[ESP600]Hi there, test from ESP3D
Email Notification
Email Notification is using SMTP and HTTPS, so you need to collect the following information fof your email supplier
- smtp server address and https port
- smtp username/ID
- smtp password
ESP3D use the parameters as follow:
- token 1 = ID to login to your email supplier
- token 2 = Password to login to your email supplier
- token settings =
the_recipient email#smtp_server:port where # and : are fields separators.
For example: luc@gmail.com#smtp.gmail.com:465
1 -Save the token 1, token 2 and token settings in ESP3D, and set EMAIL as notification supplier
[ESP610]type=EMAIL T1=luc@gmail.com T2=mypassword TS=luc@gmail.com#smtp.gmail.com:465
2 - Type [ESP610] to verify (T1 and T2 won’t be displayed)
3 - Try to send message:
[ESP600]Hi there, test from ESP3D
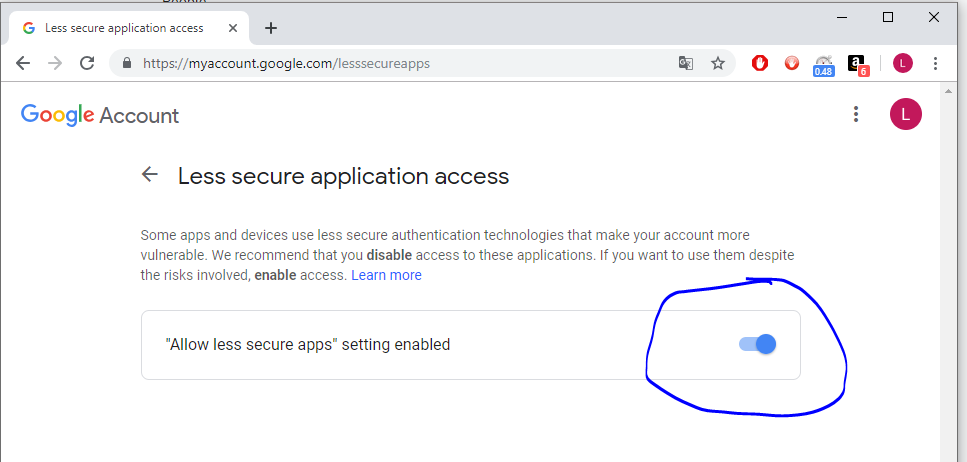
4 - Important : if you are using Gmail there is an additional step, as by default https access is disabled.
go to : https://myaccount.google.com/lesssecureapps and allow less secure applications to connect
IFTTT Notification
IFTTT is free service up to 5 applets
IFTTT is a wrapper that allows several kind of notifications, please refer to it documentation.
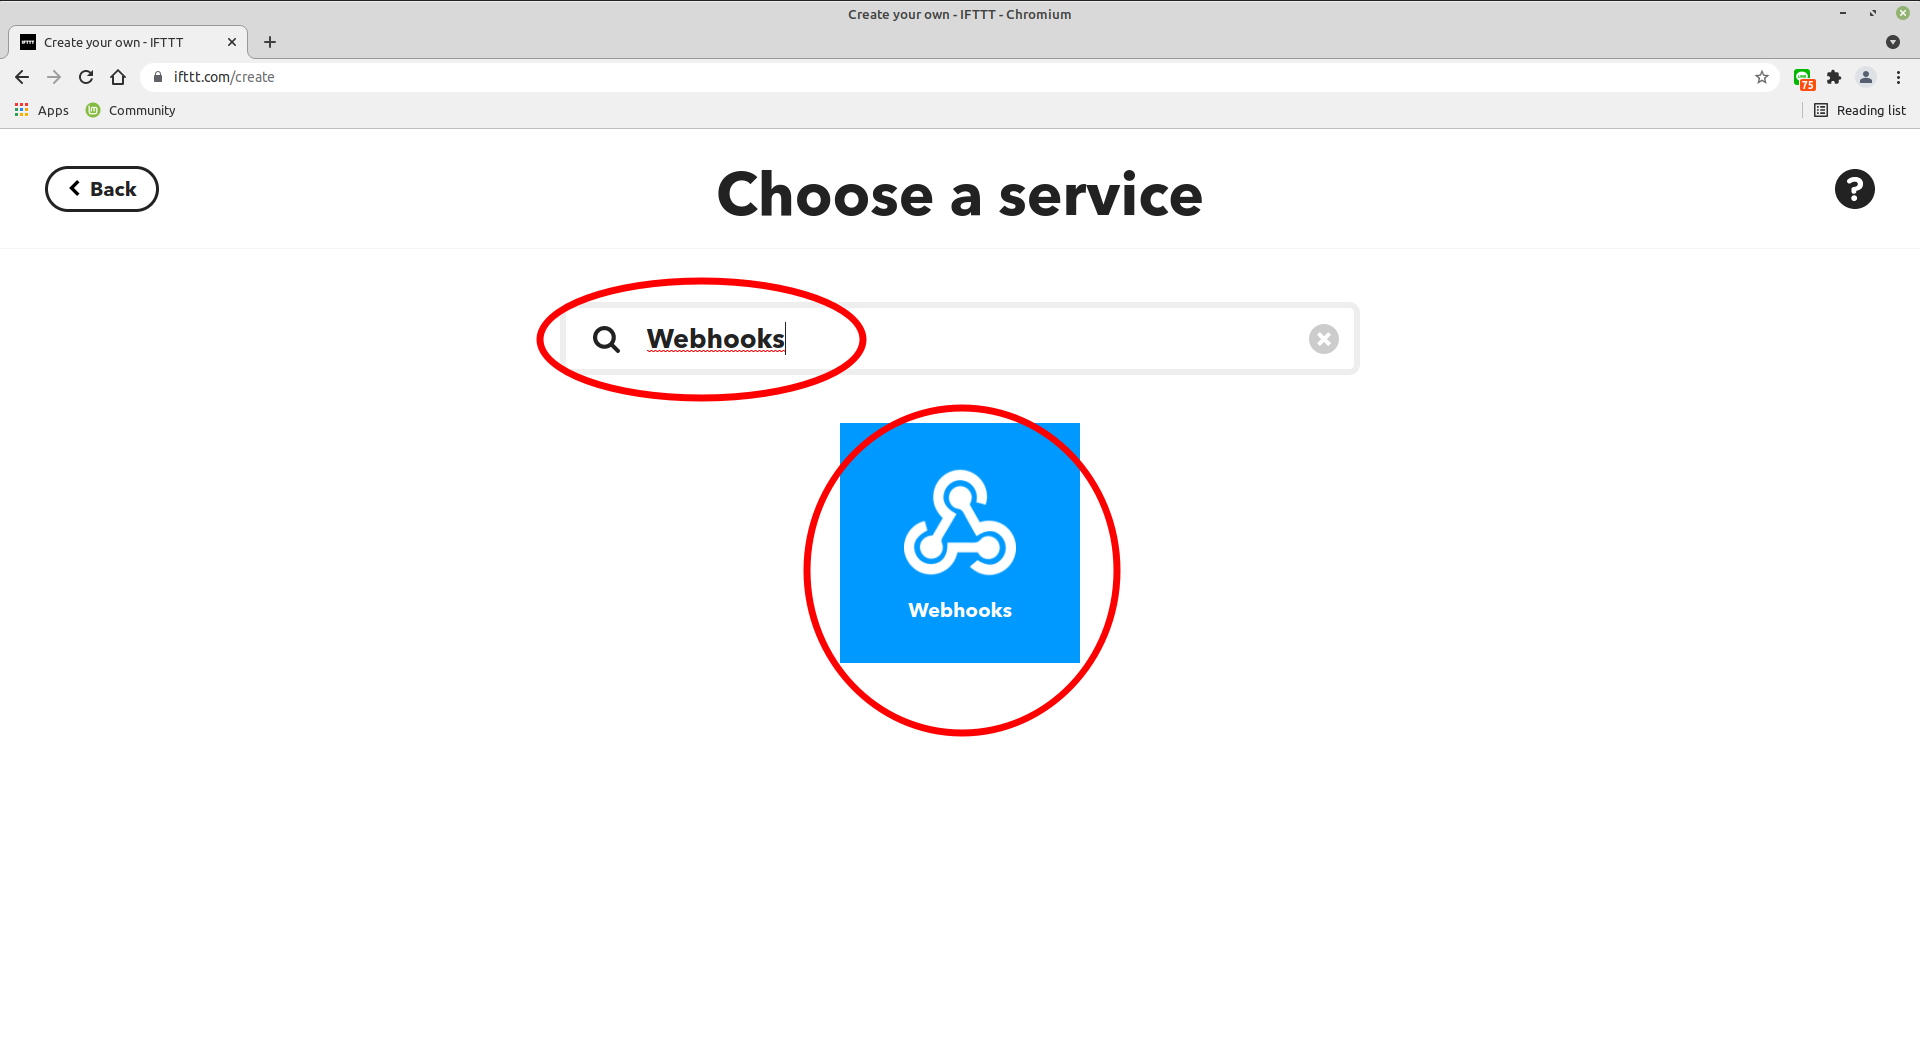
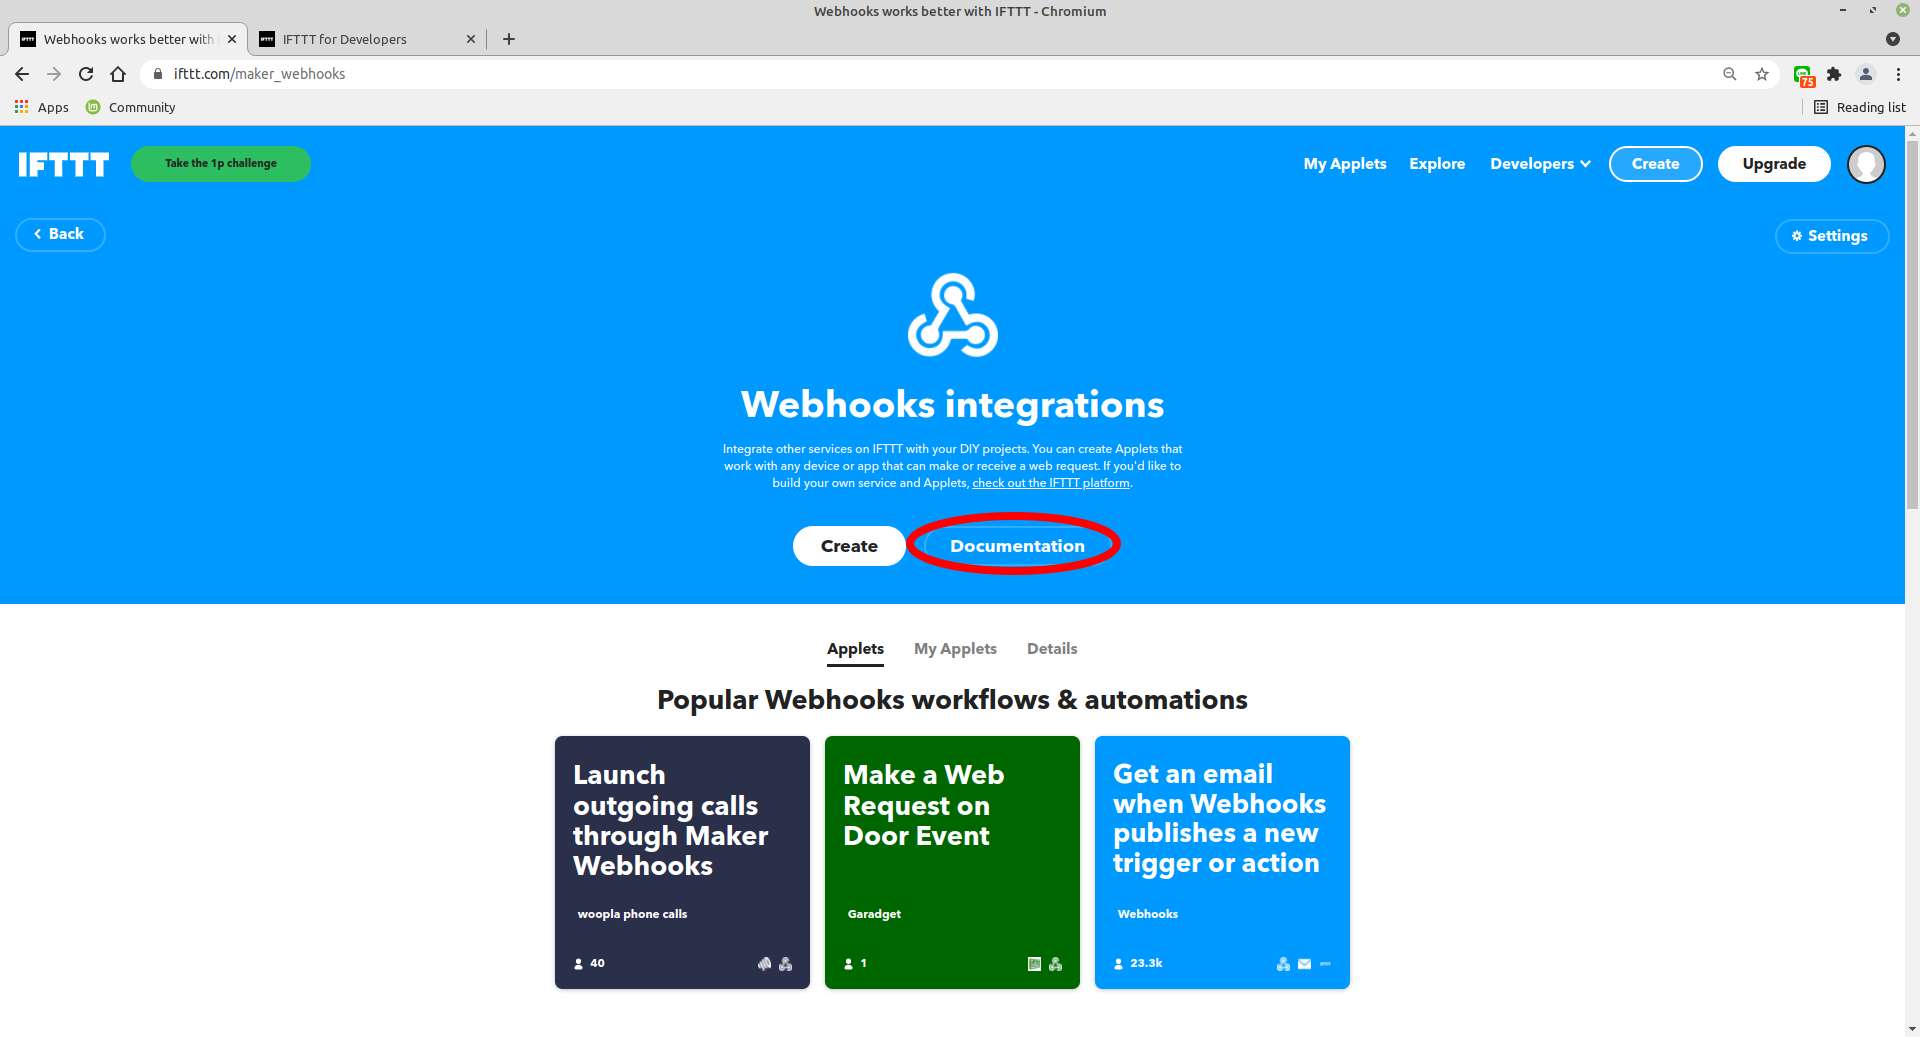
ESP3D use the webhook method.
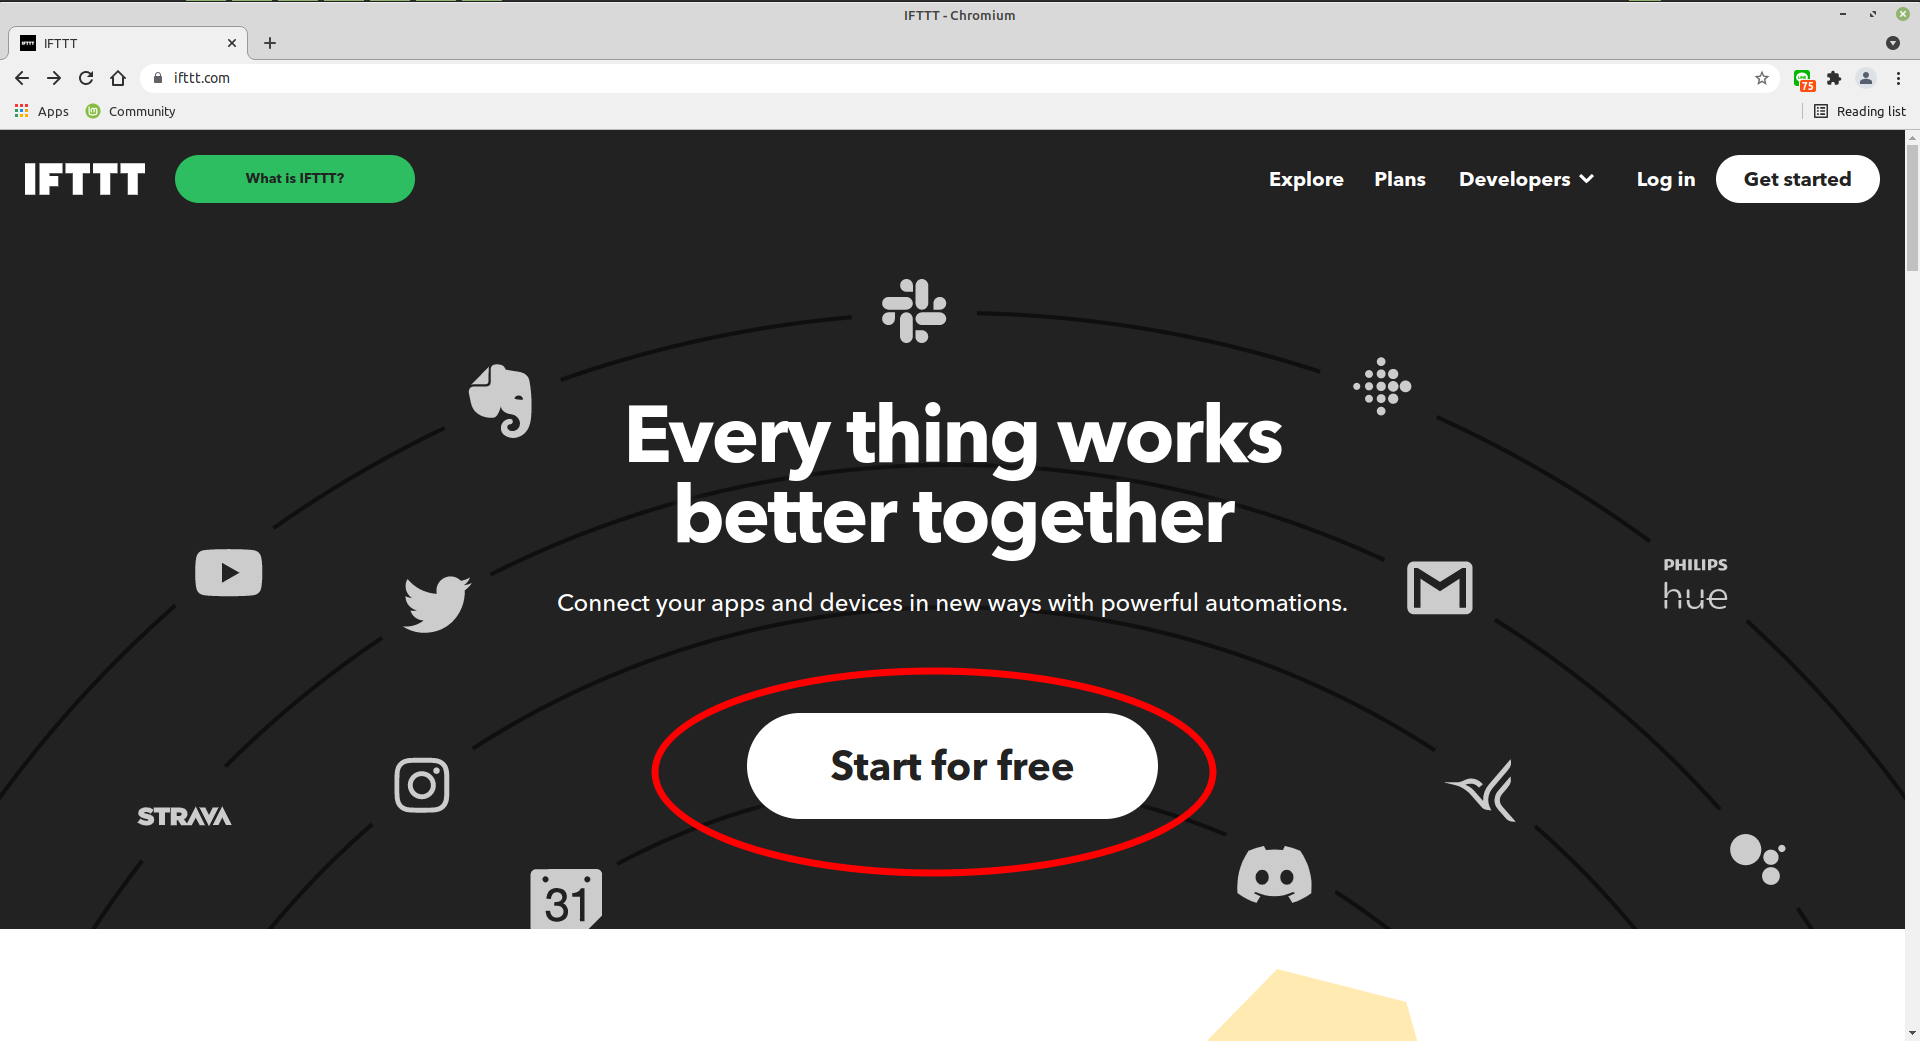
1 - If you do not have IFTTT account you can create for free to use up to 5 applets.
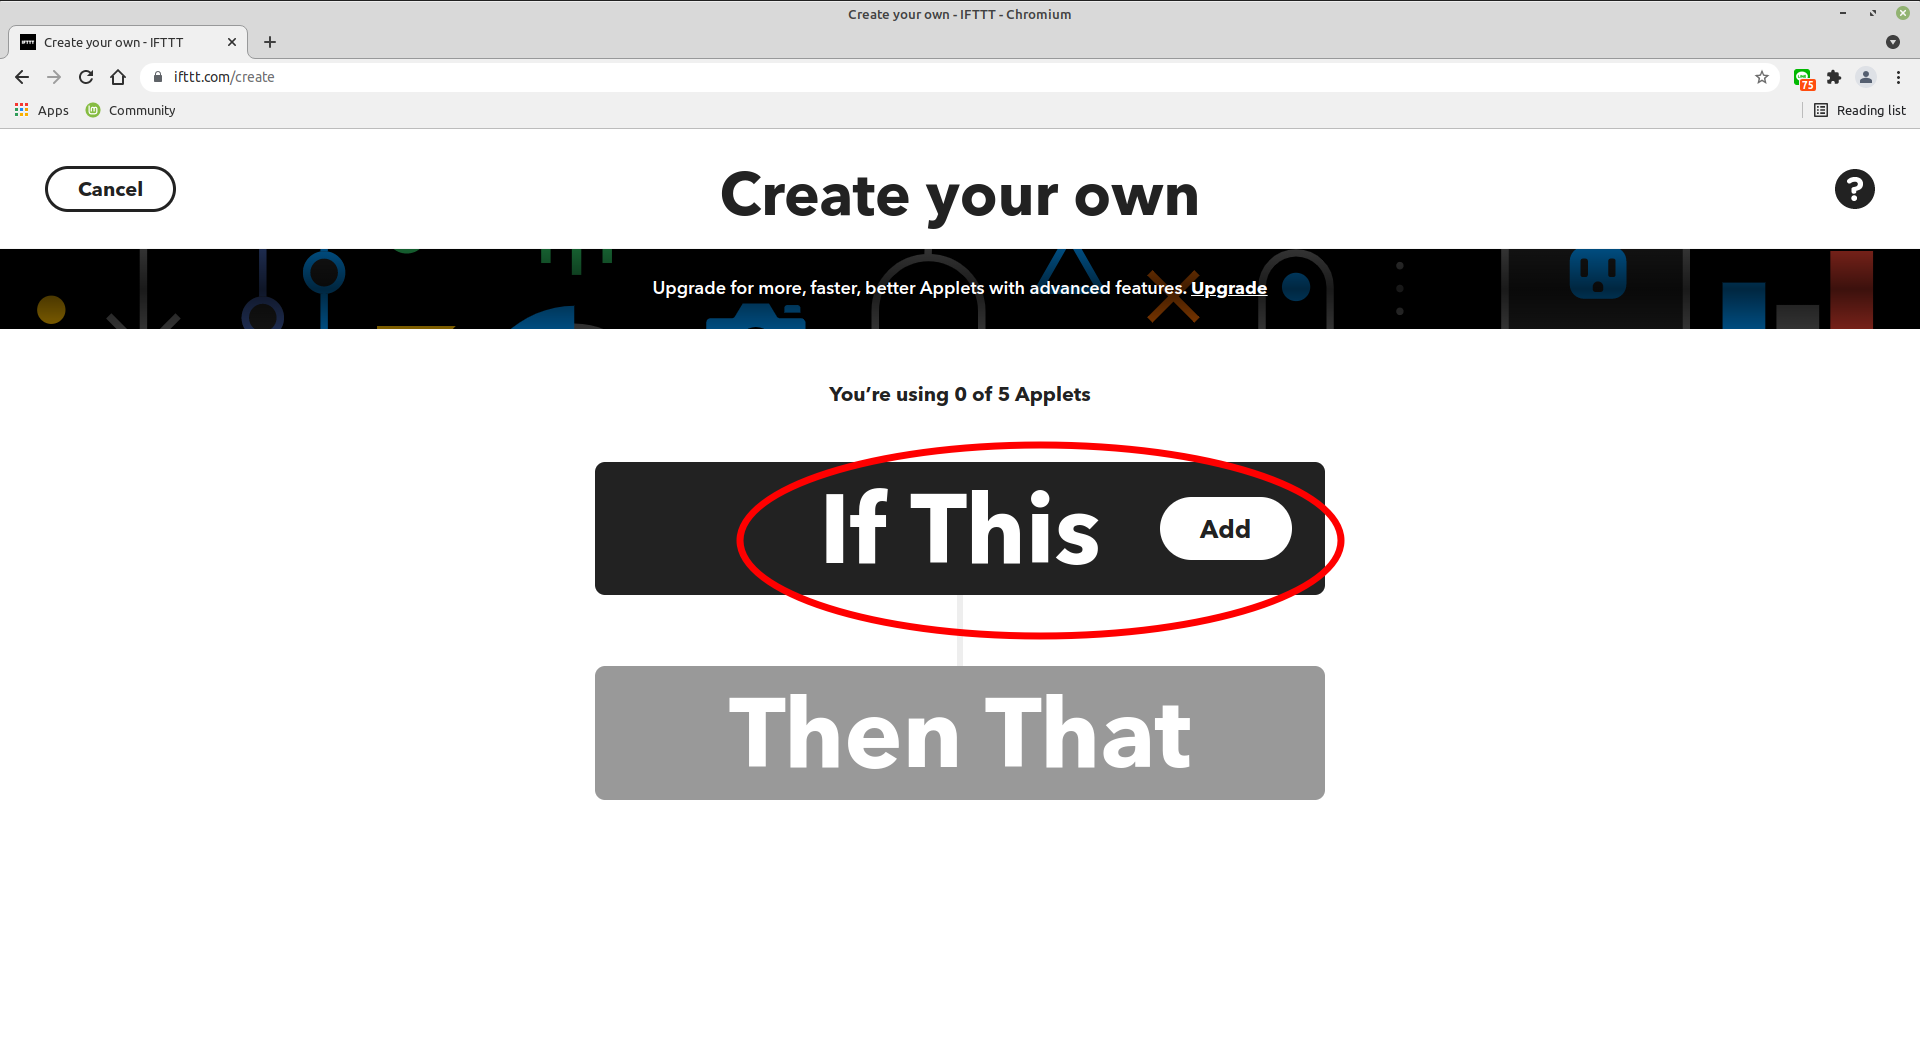
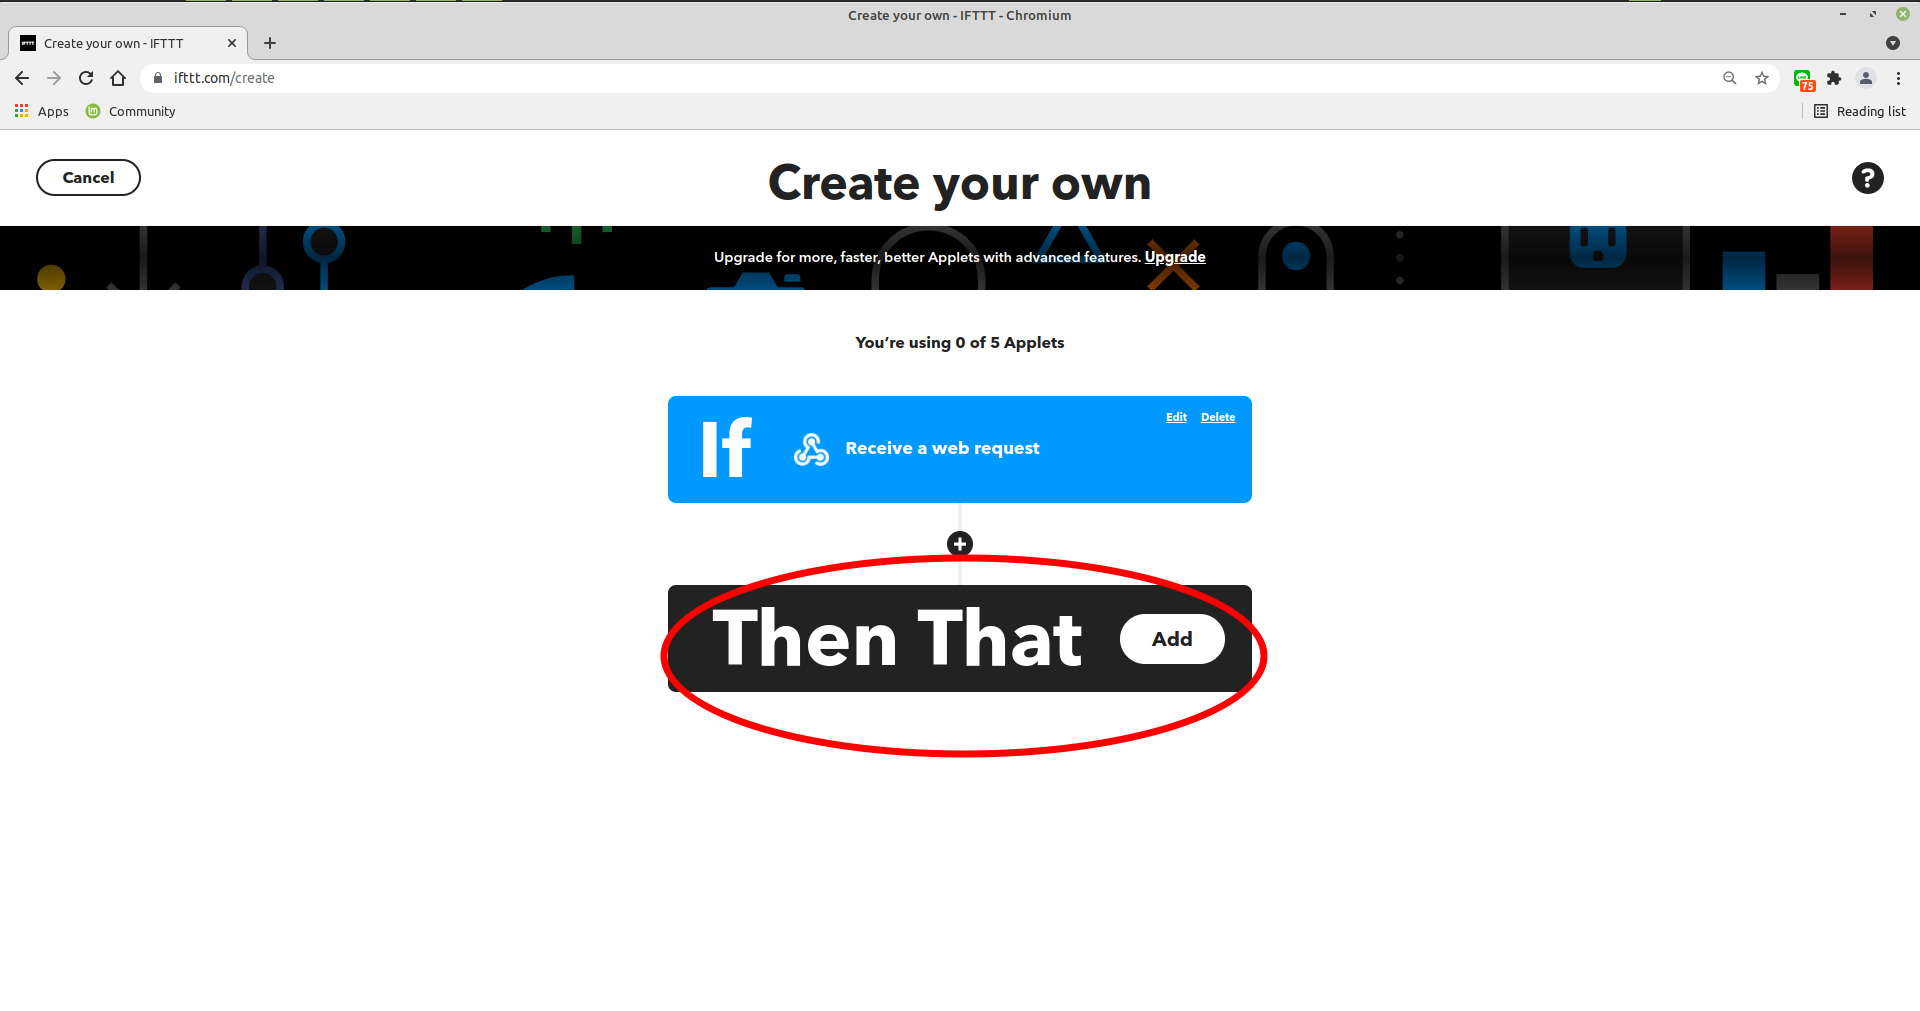
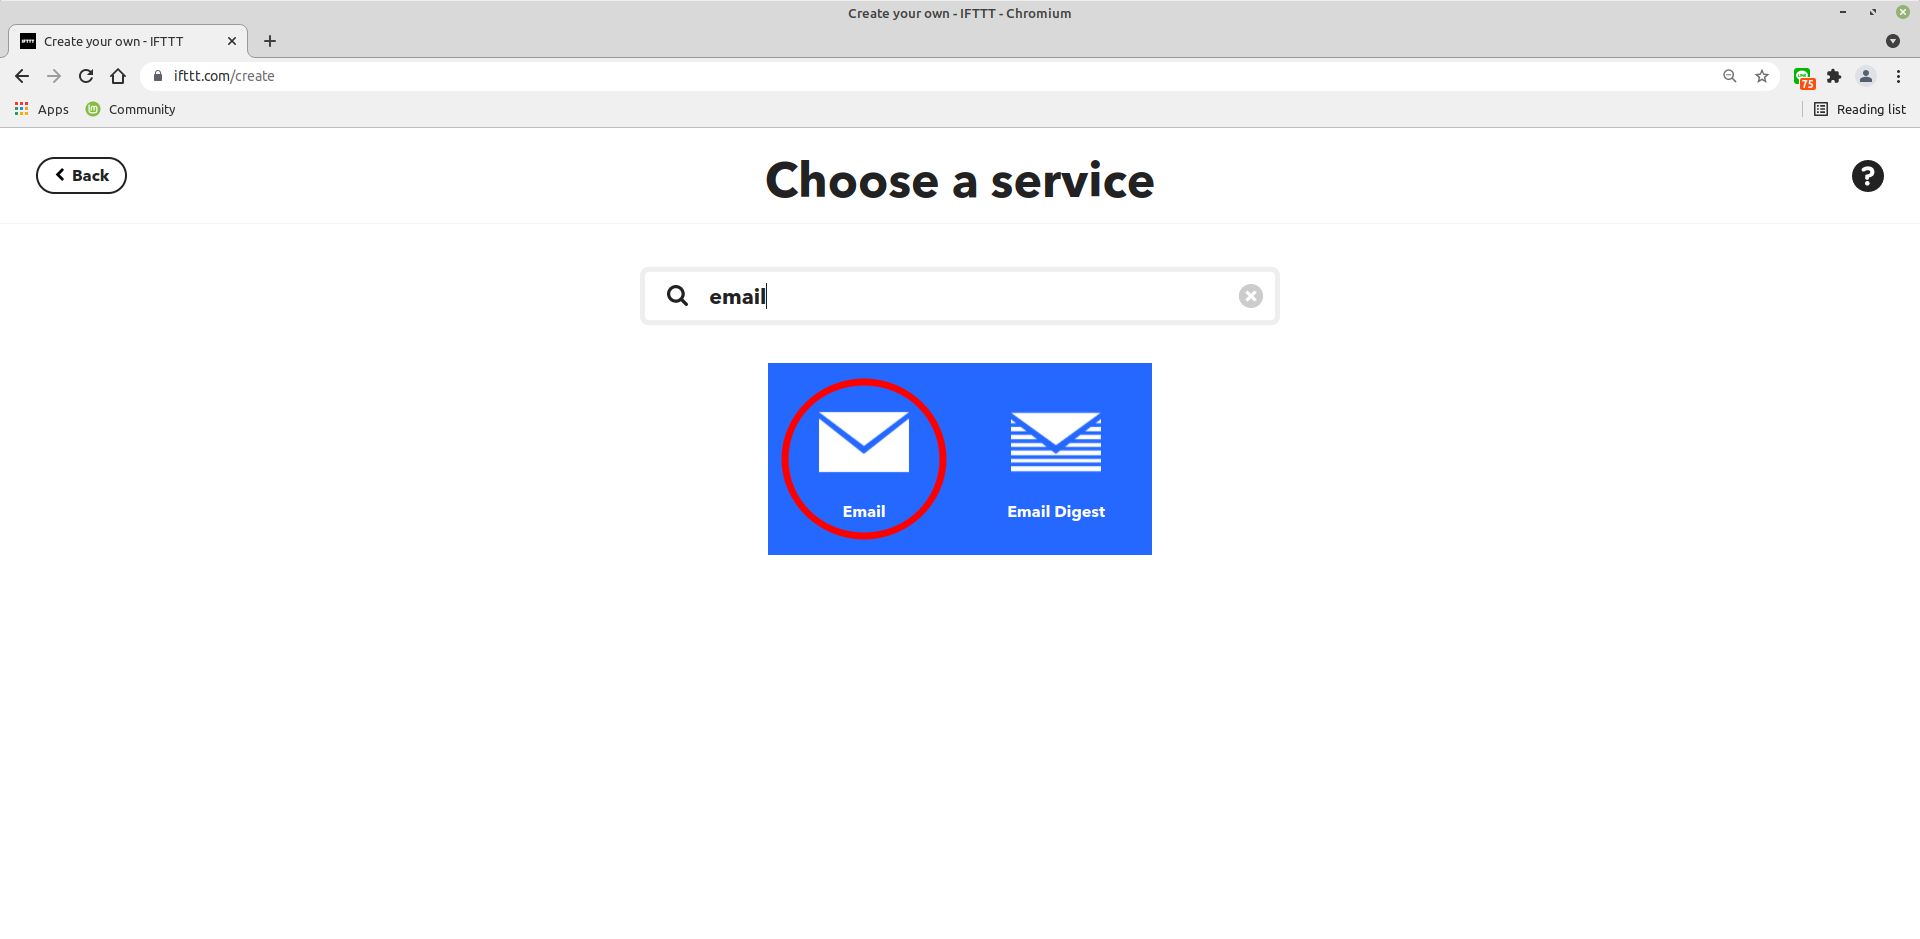
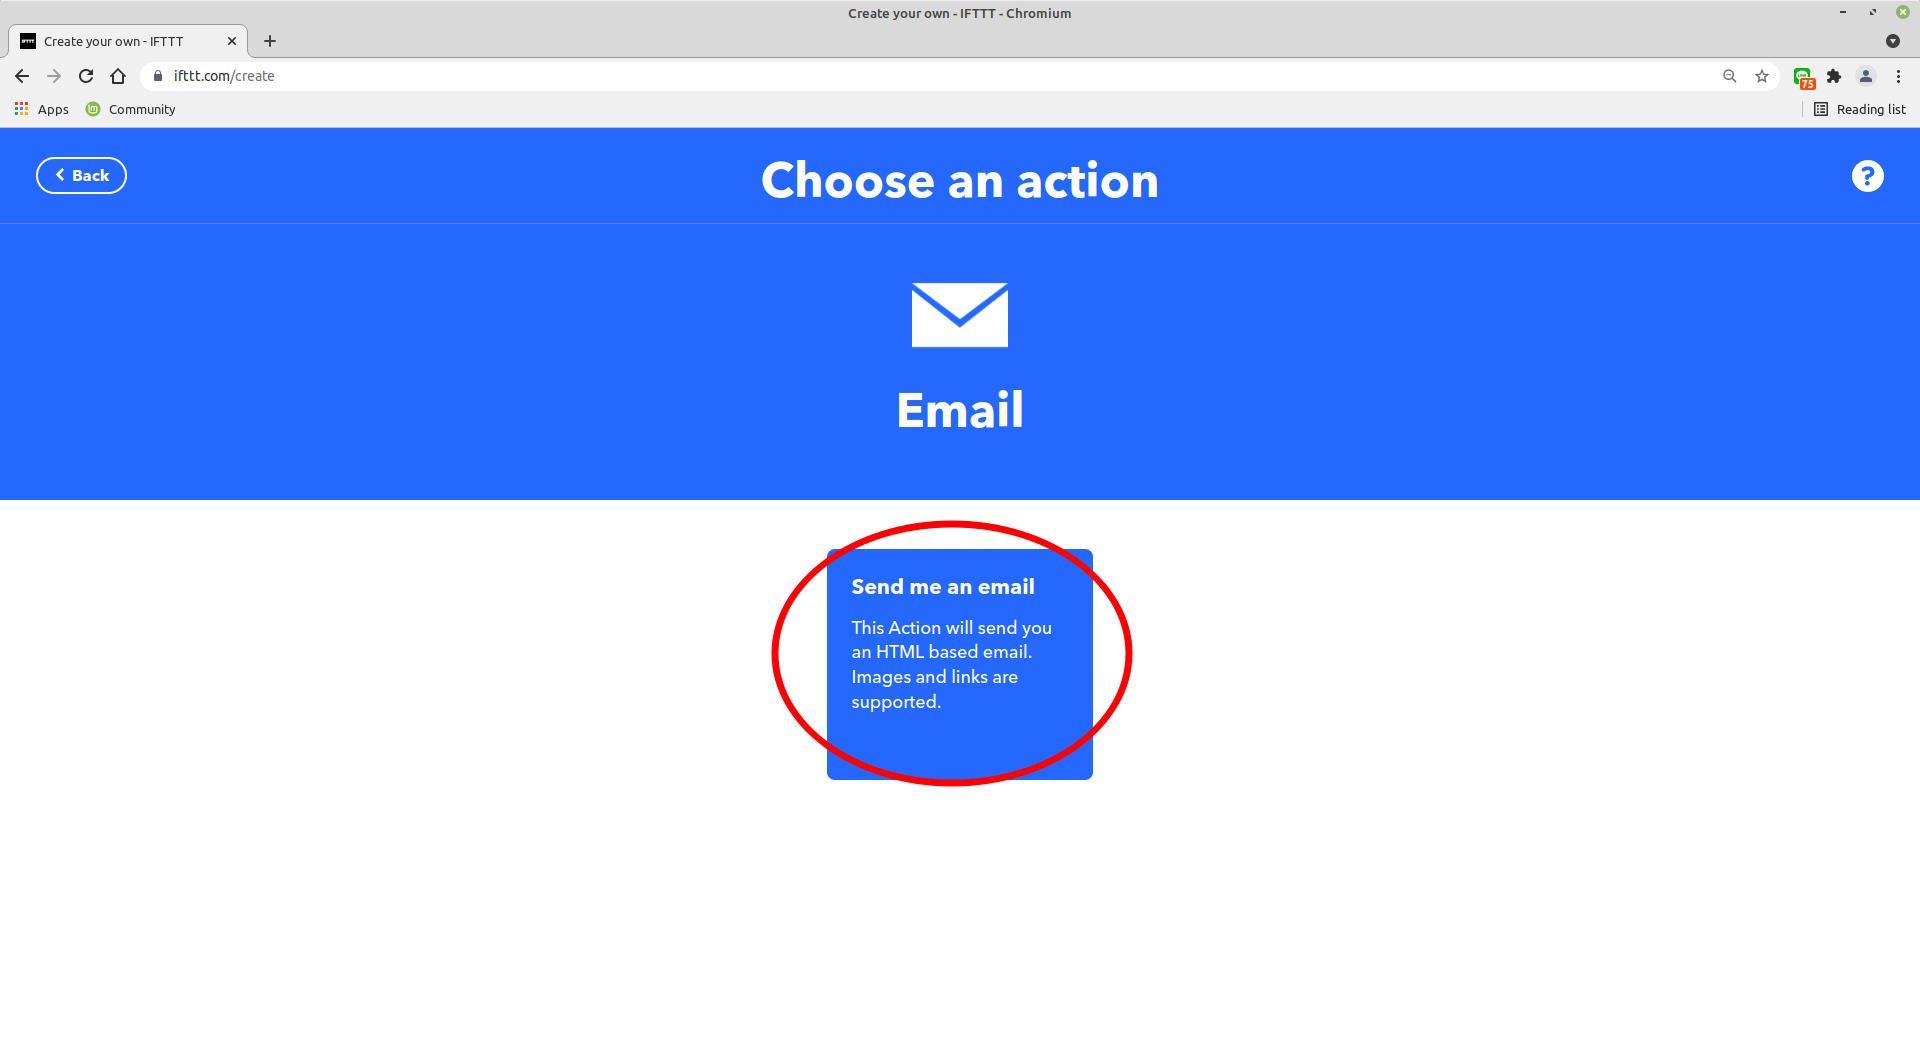
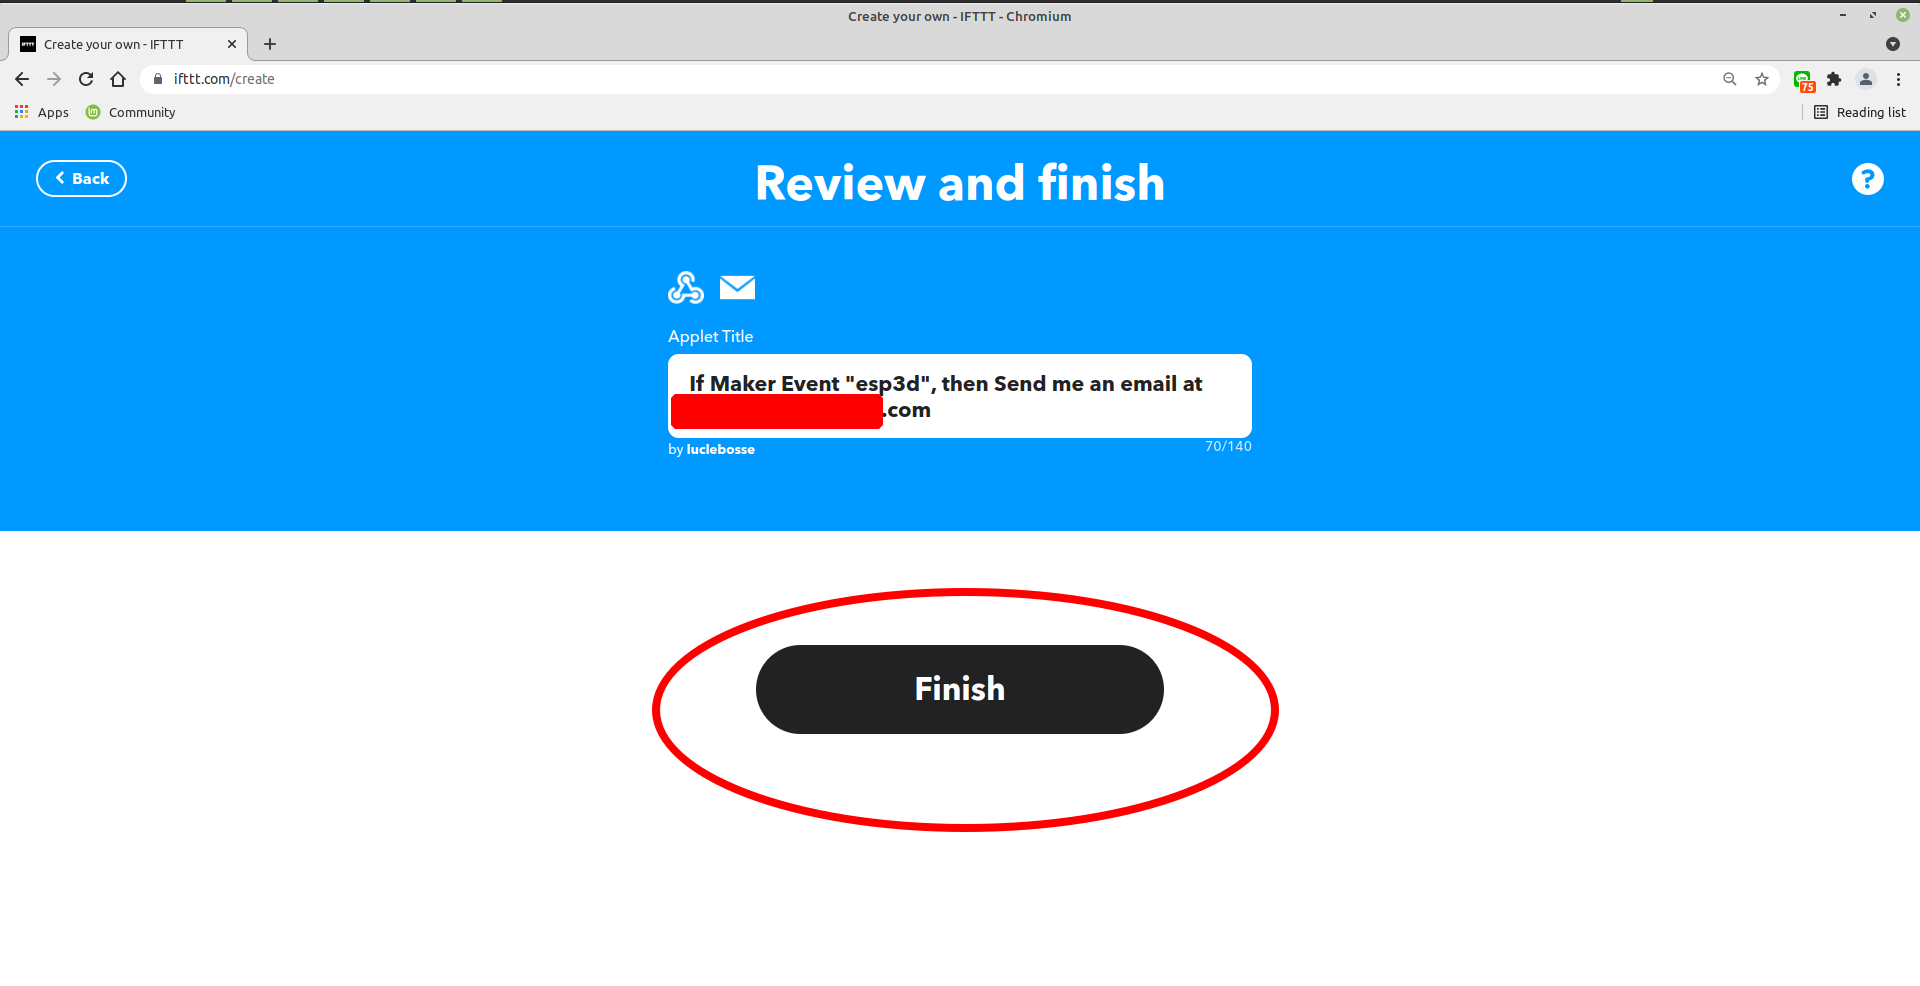
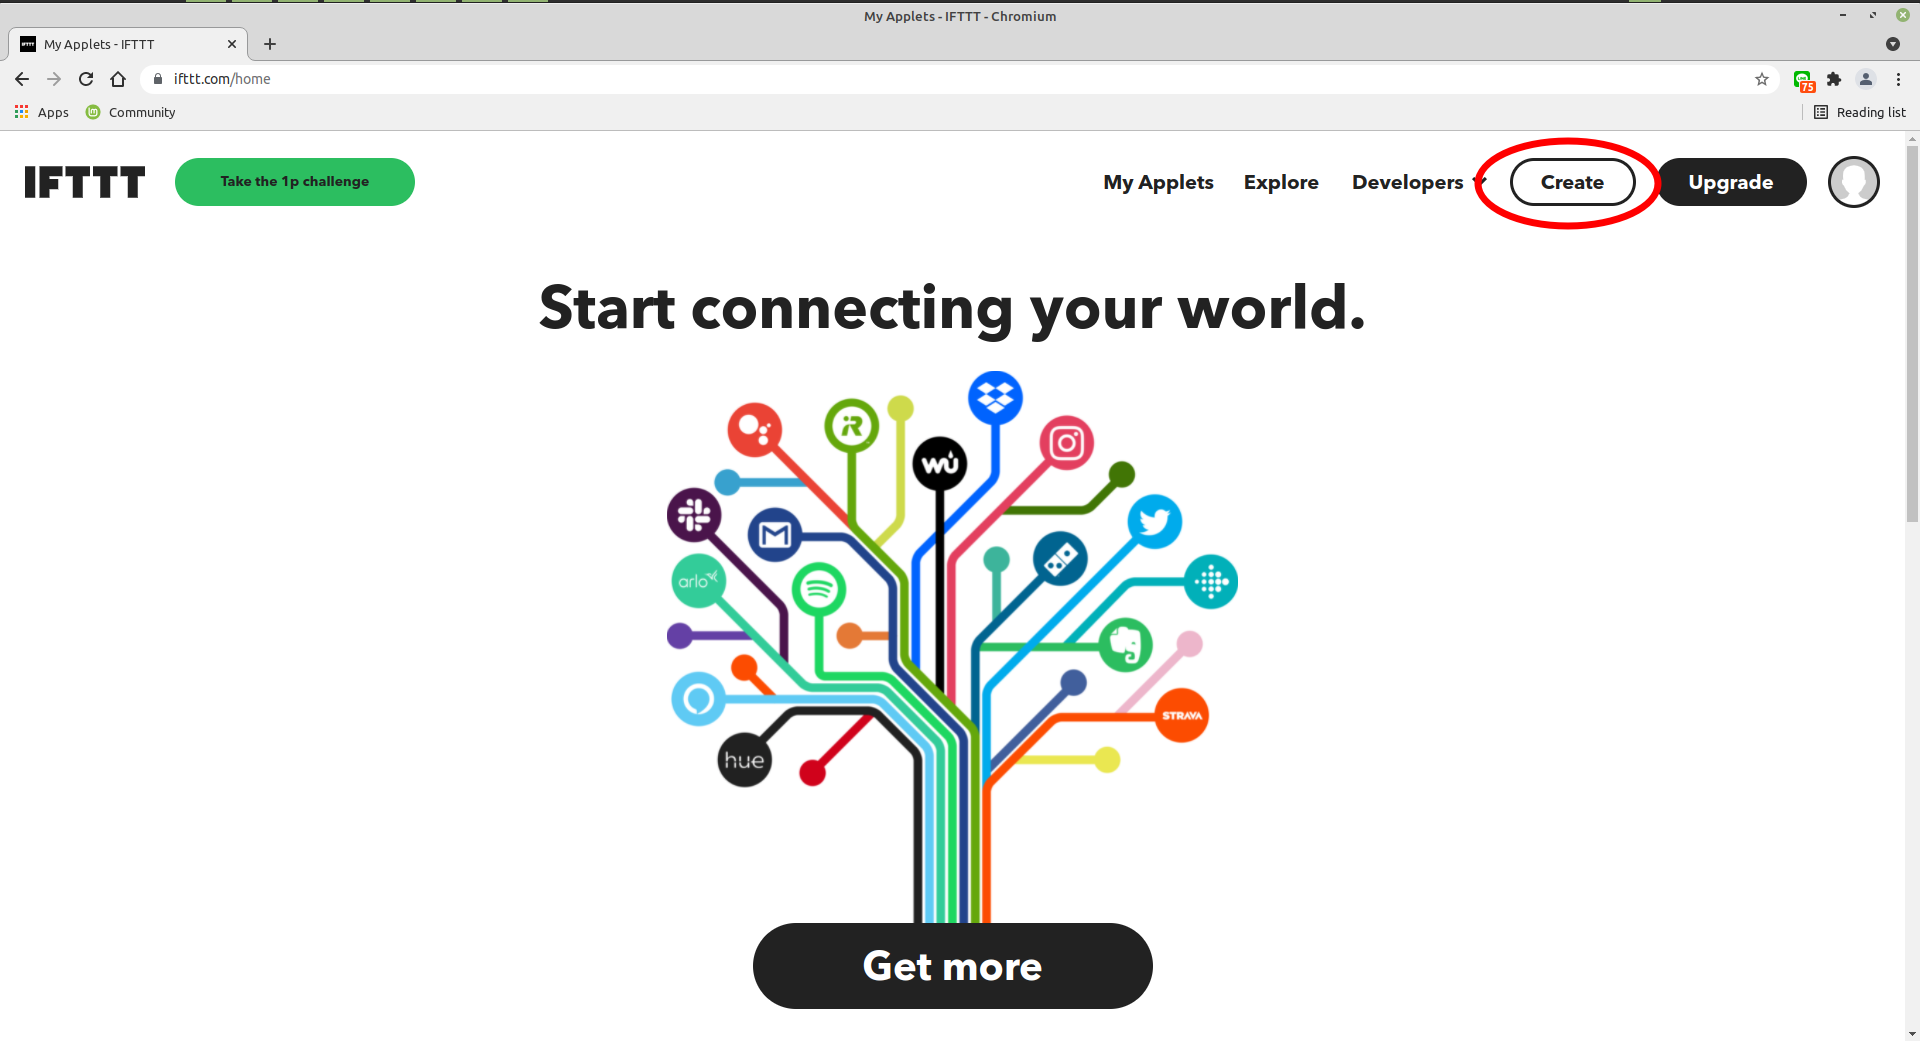
2 - Create New applet
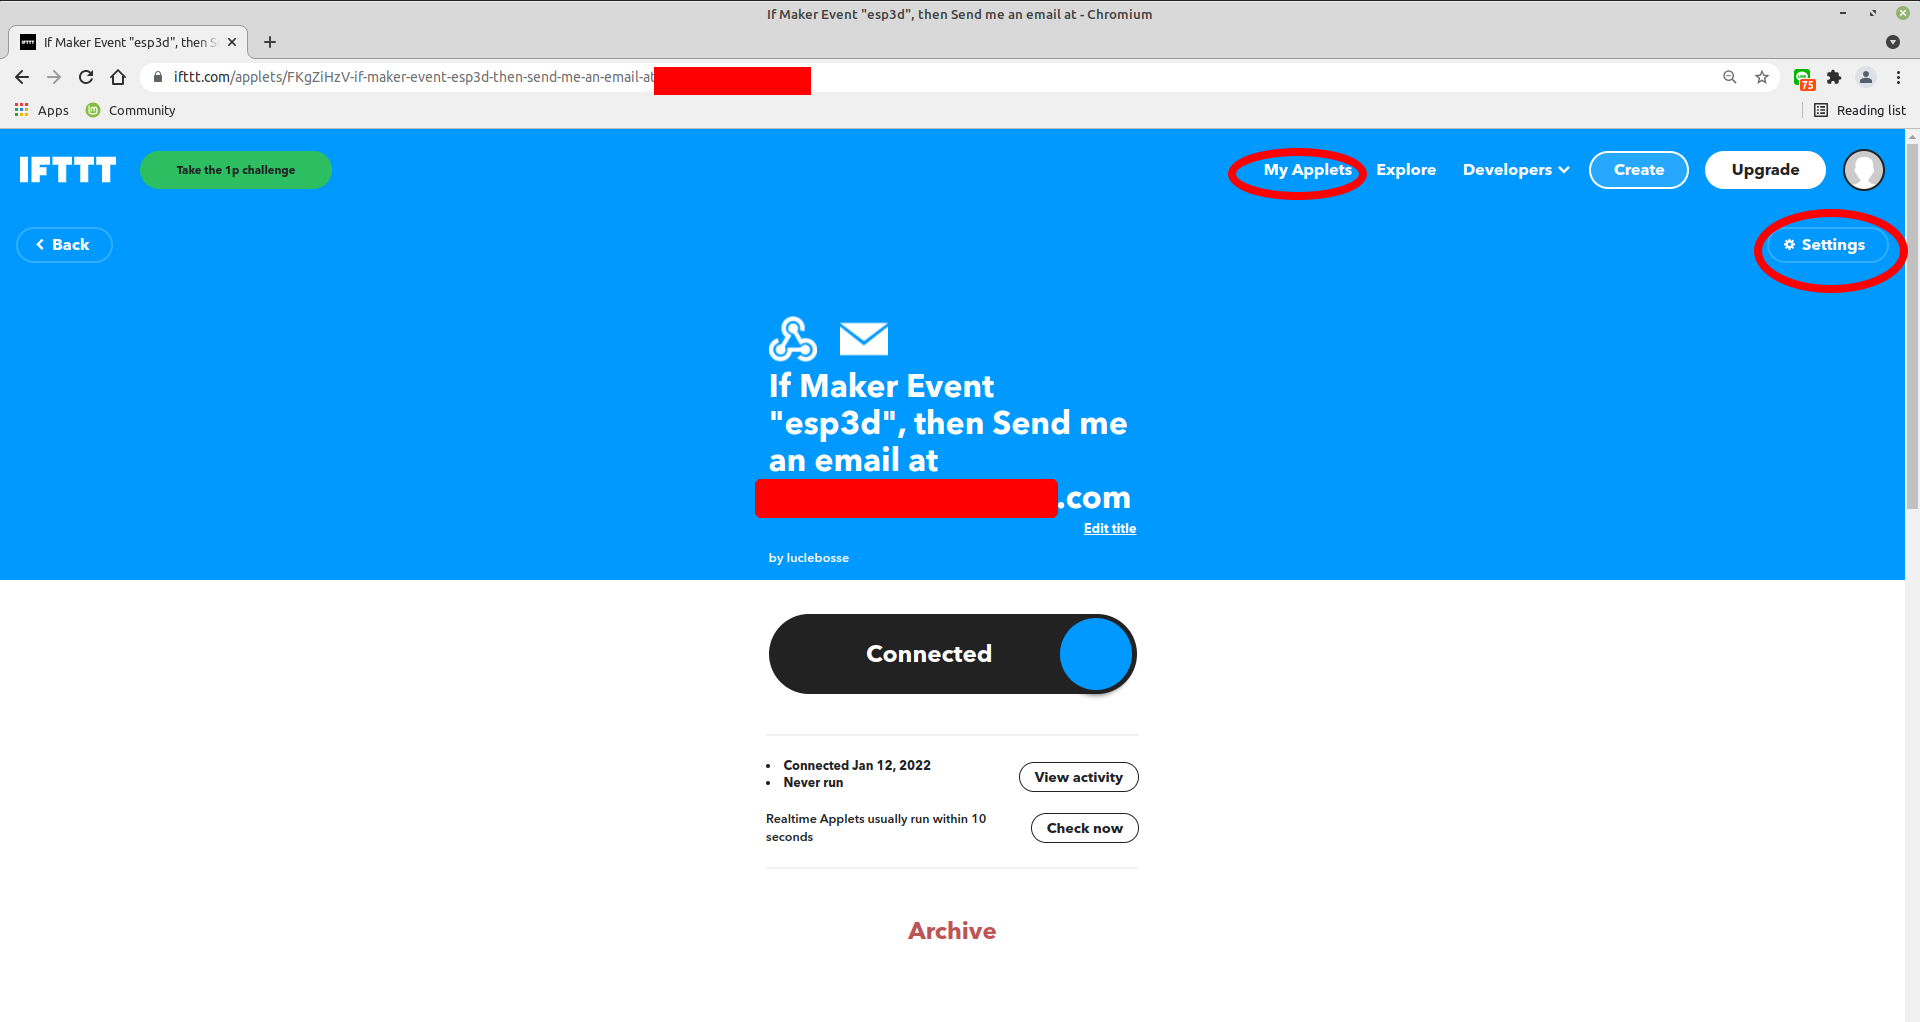
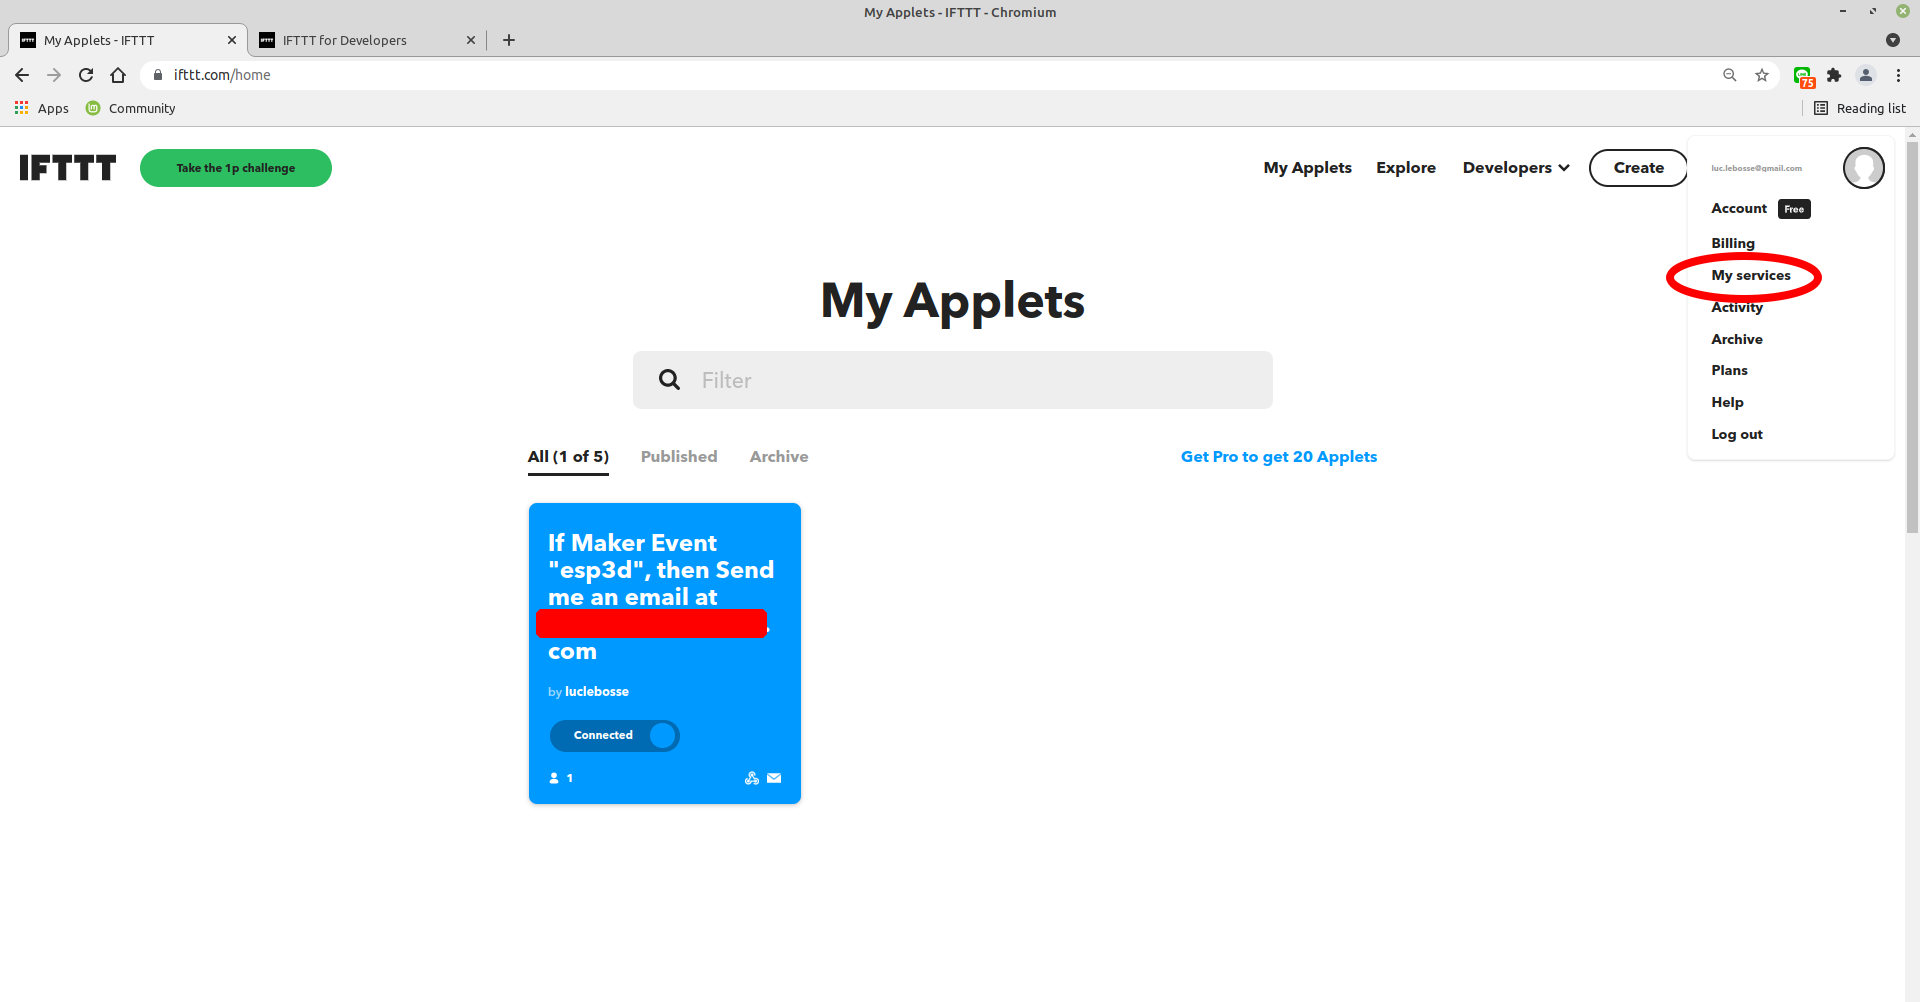
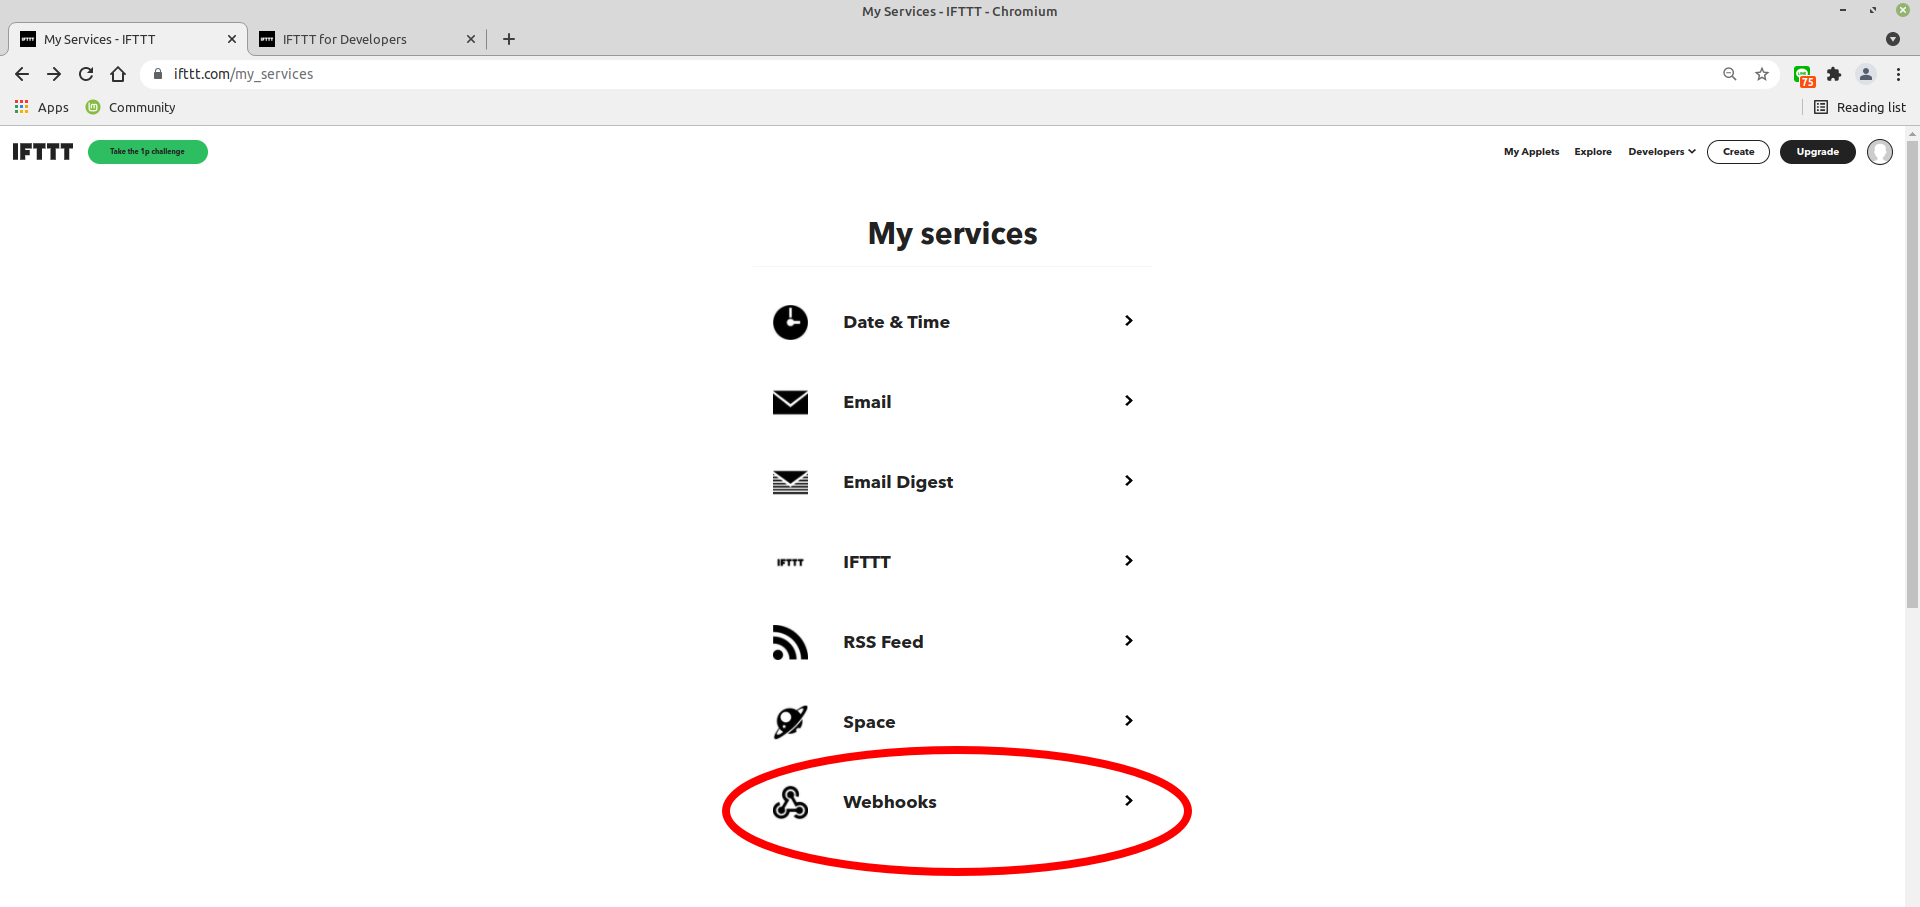
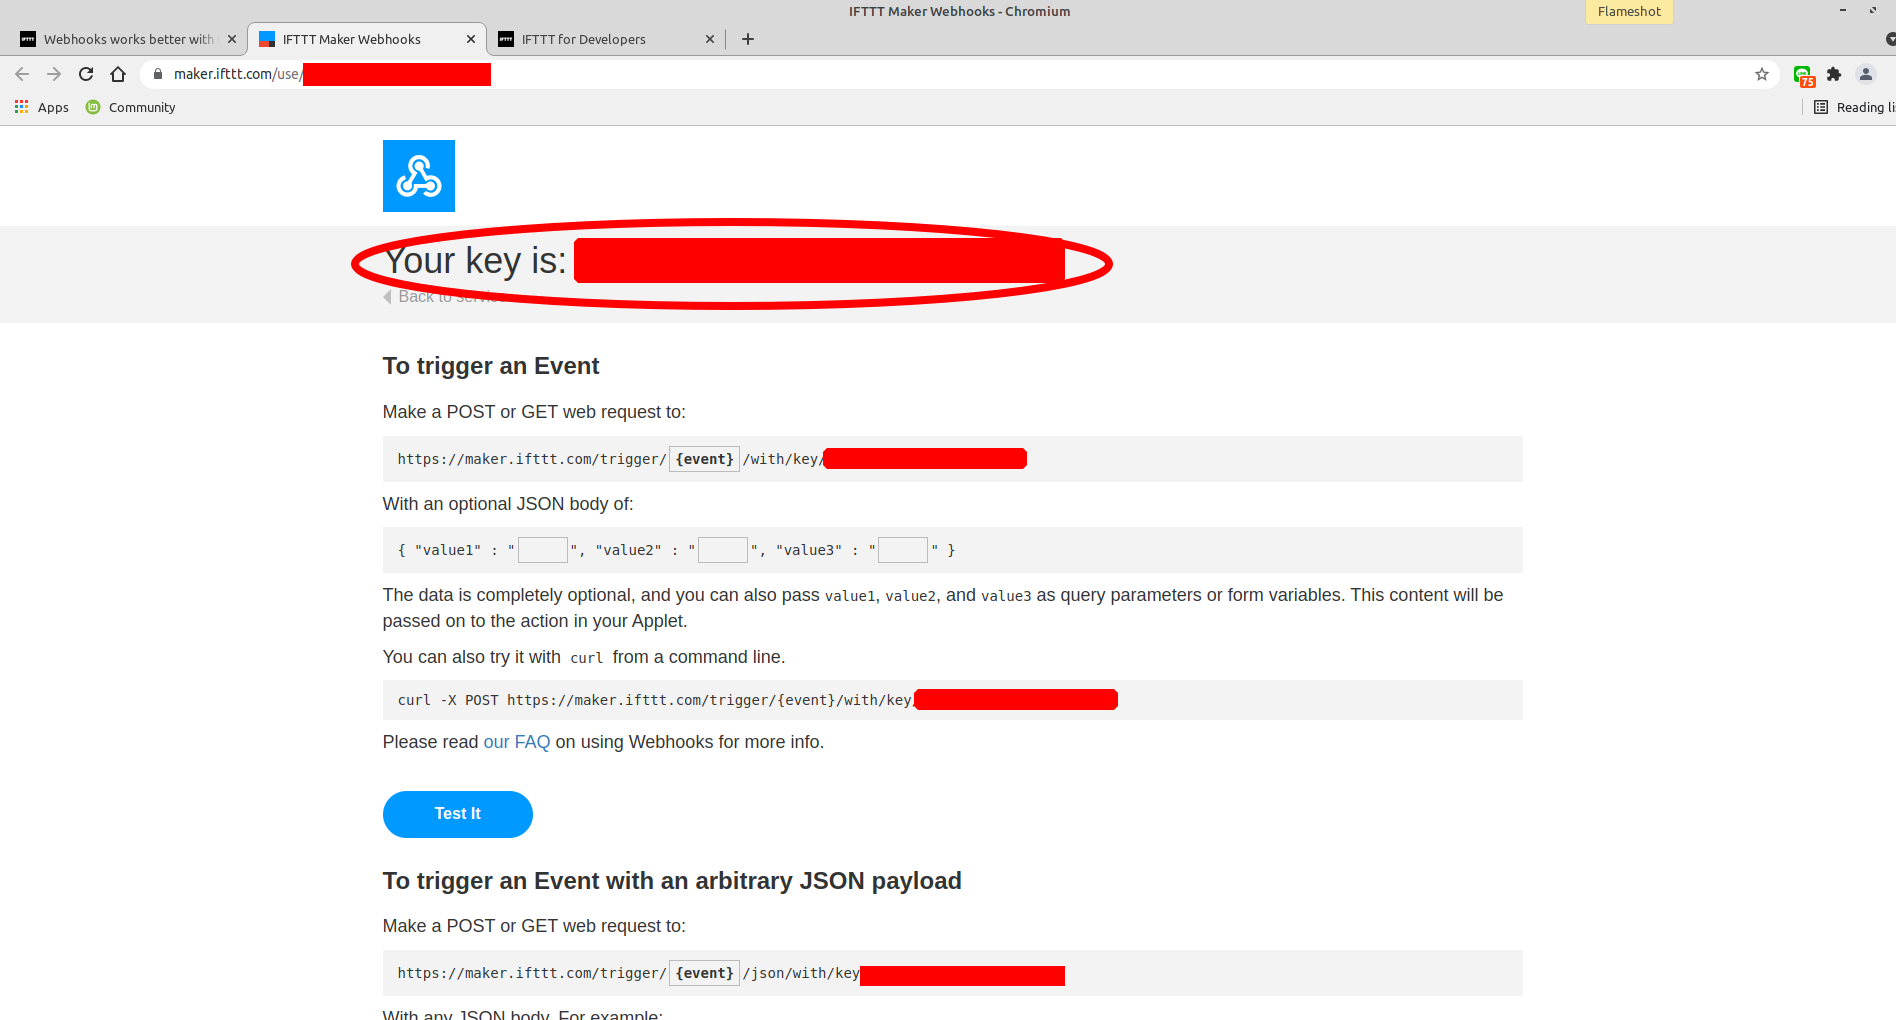
3 - Retrieve the webhook key
4 - Save the generate token and chatID in ESP3D, and set IFTTT as notification supplier
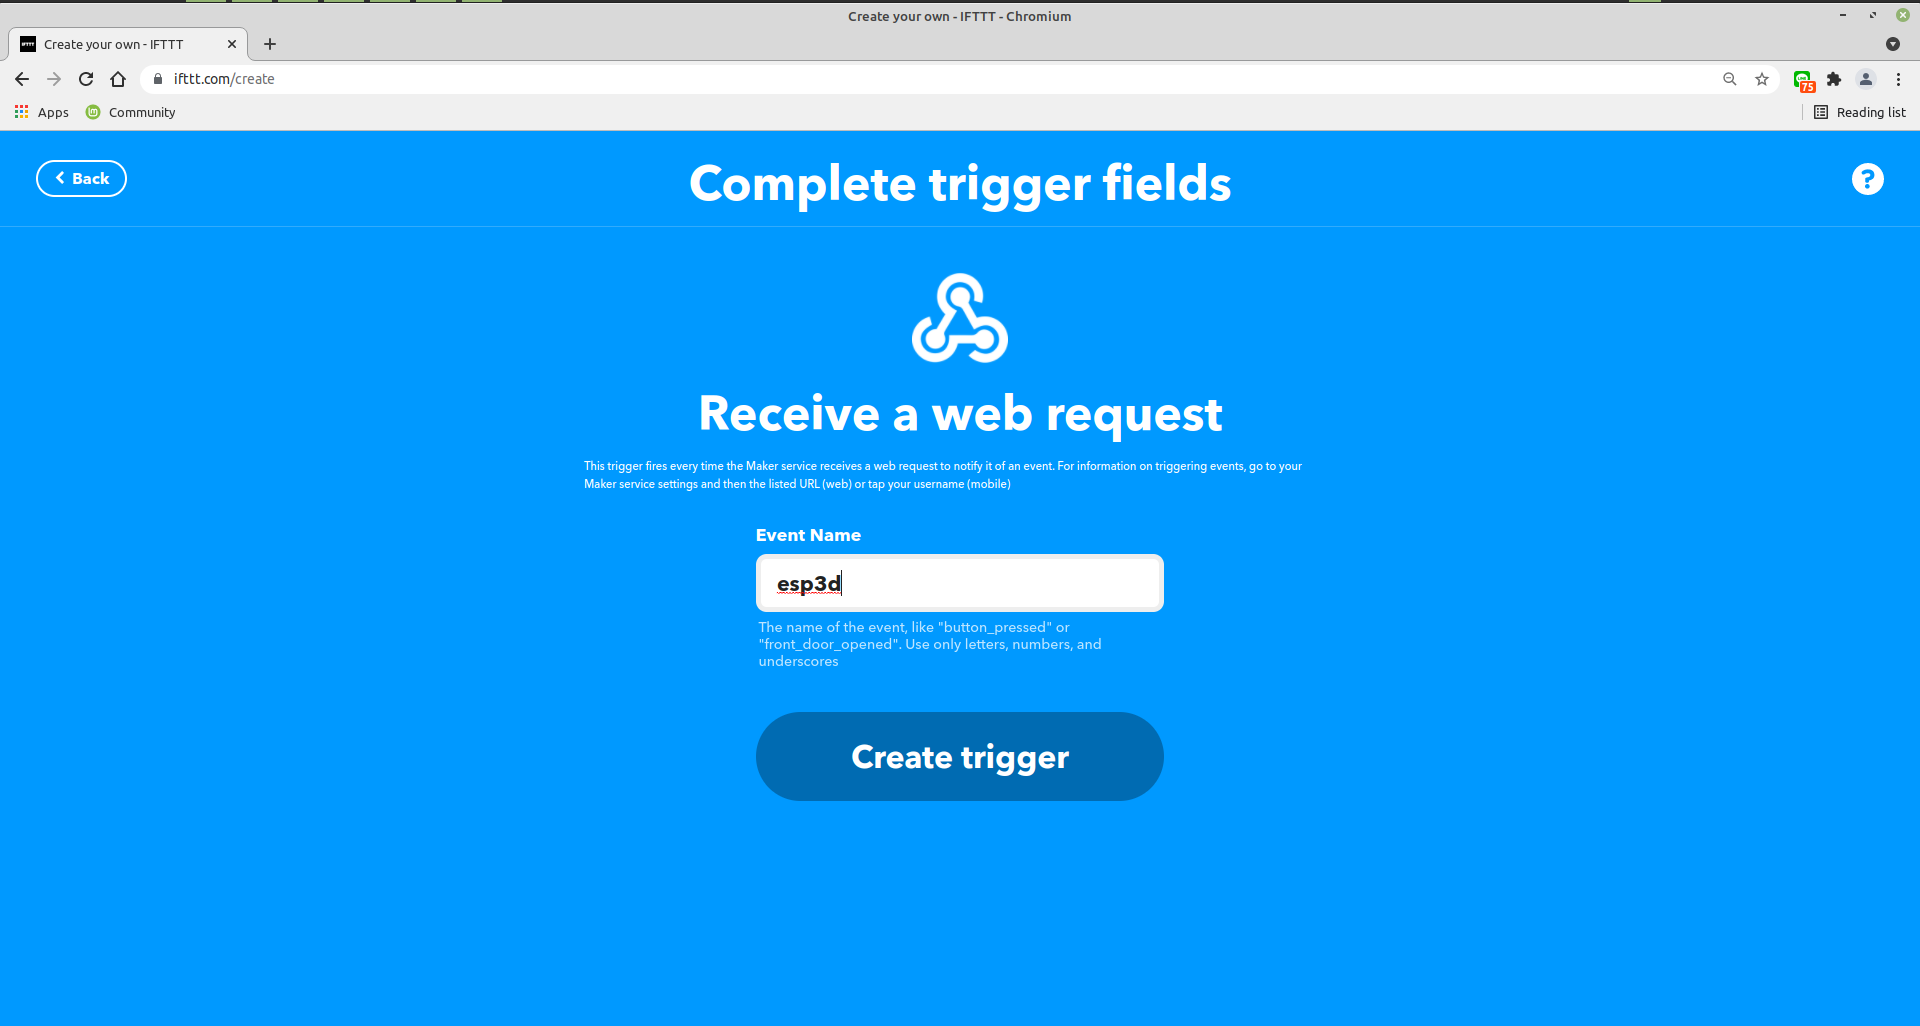
[ESP610]type=IFTTT T1={event} T2={webhooks_key}
5 - type [ESP610] to verify (T1/T2 won’t be displayed)
6 - Try to send message:
[ESP600]Hi there, test from ESP3D
7 - Verify the workflow
- Go to Applets
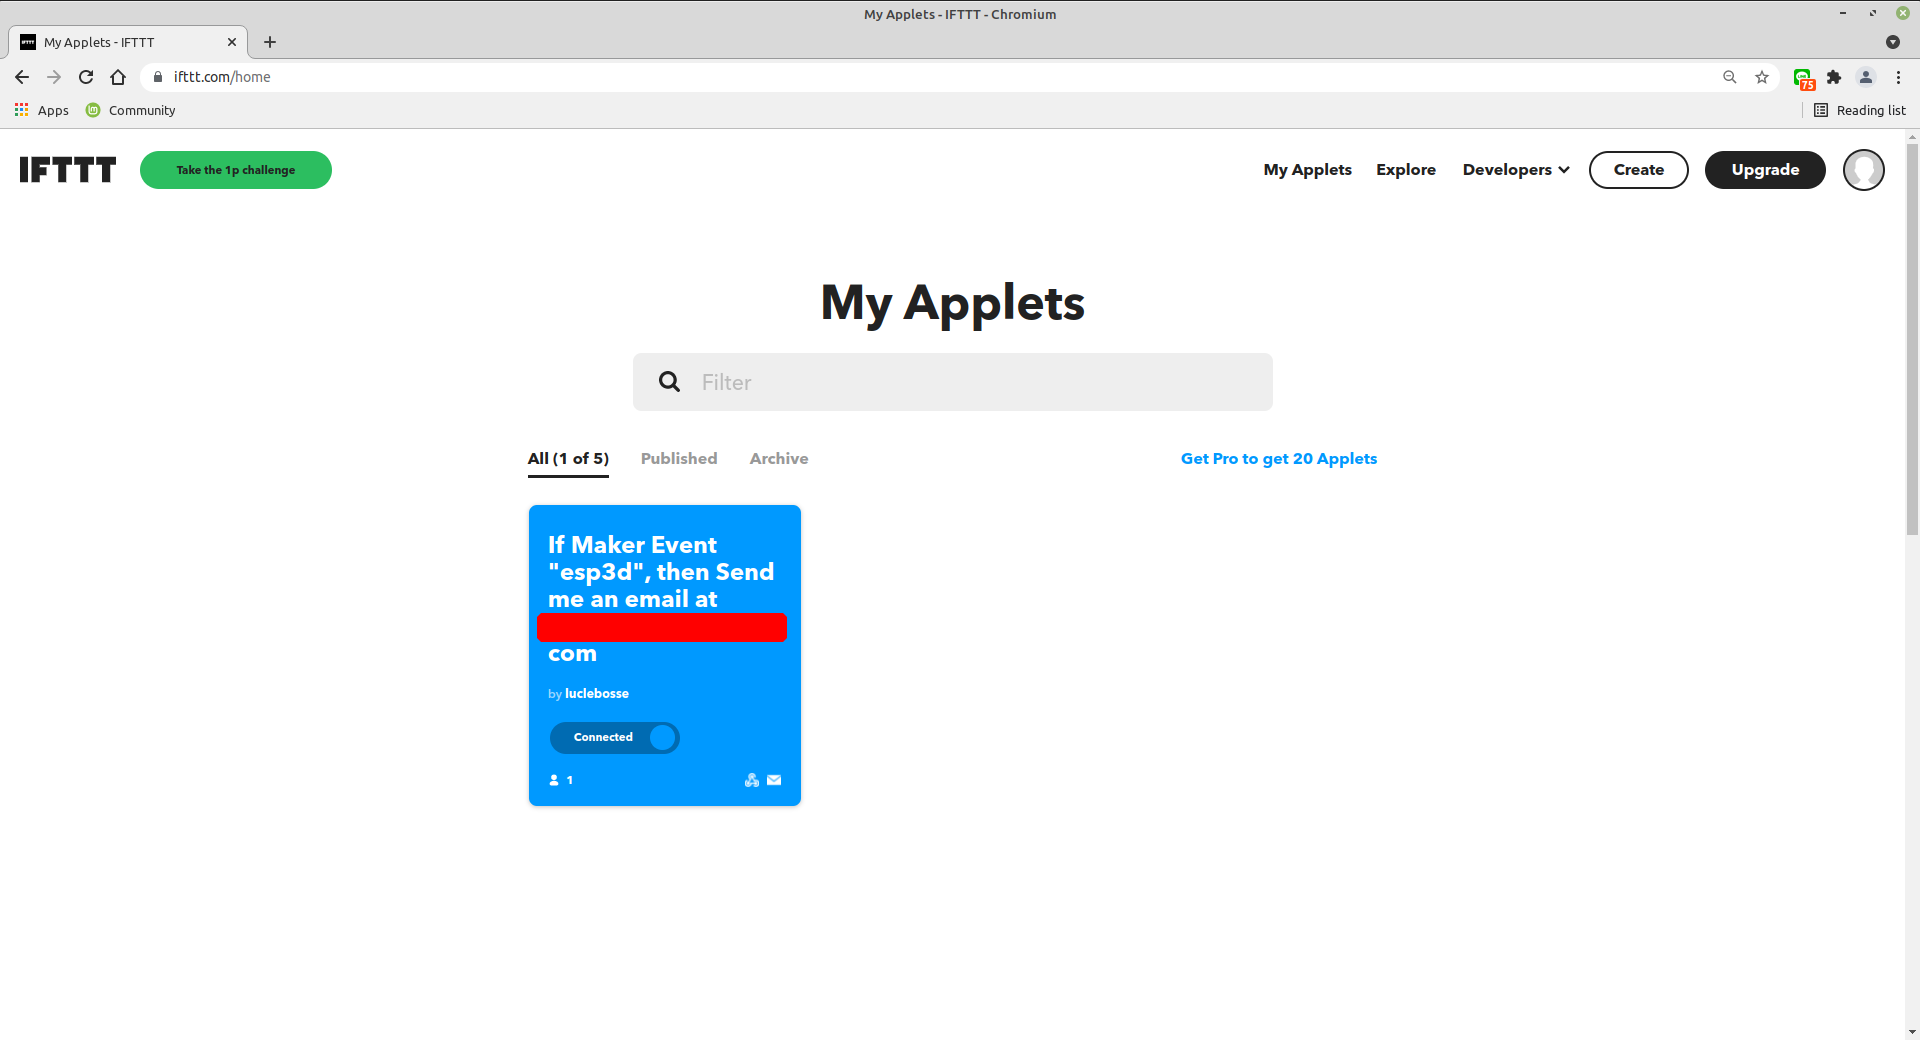
- Select Activity
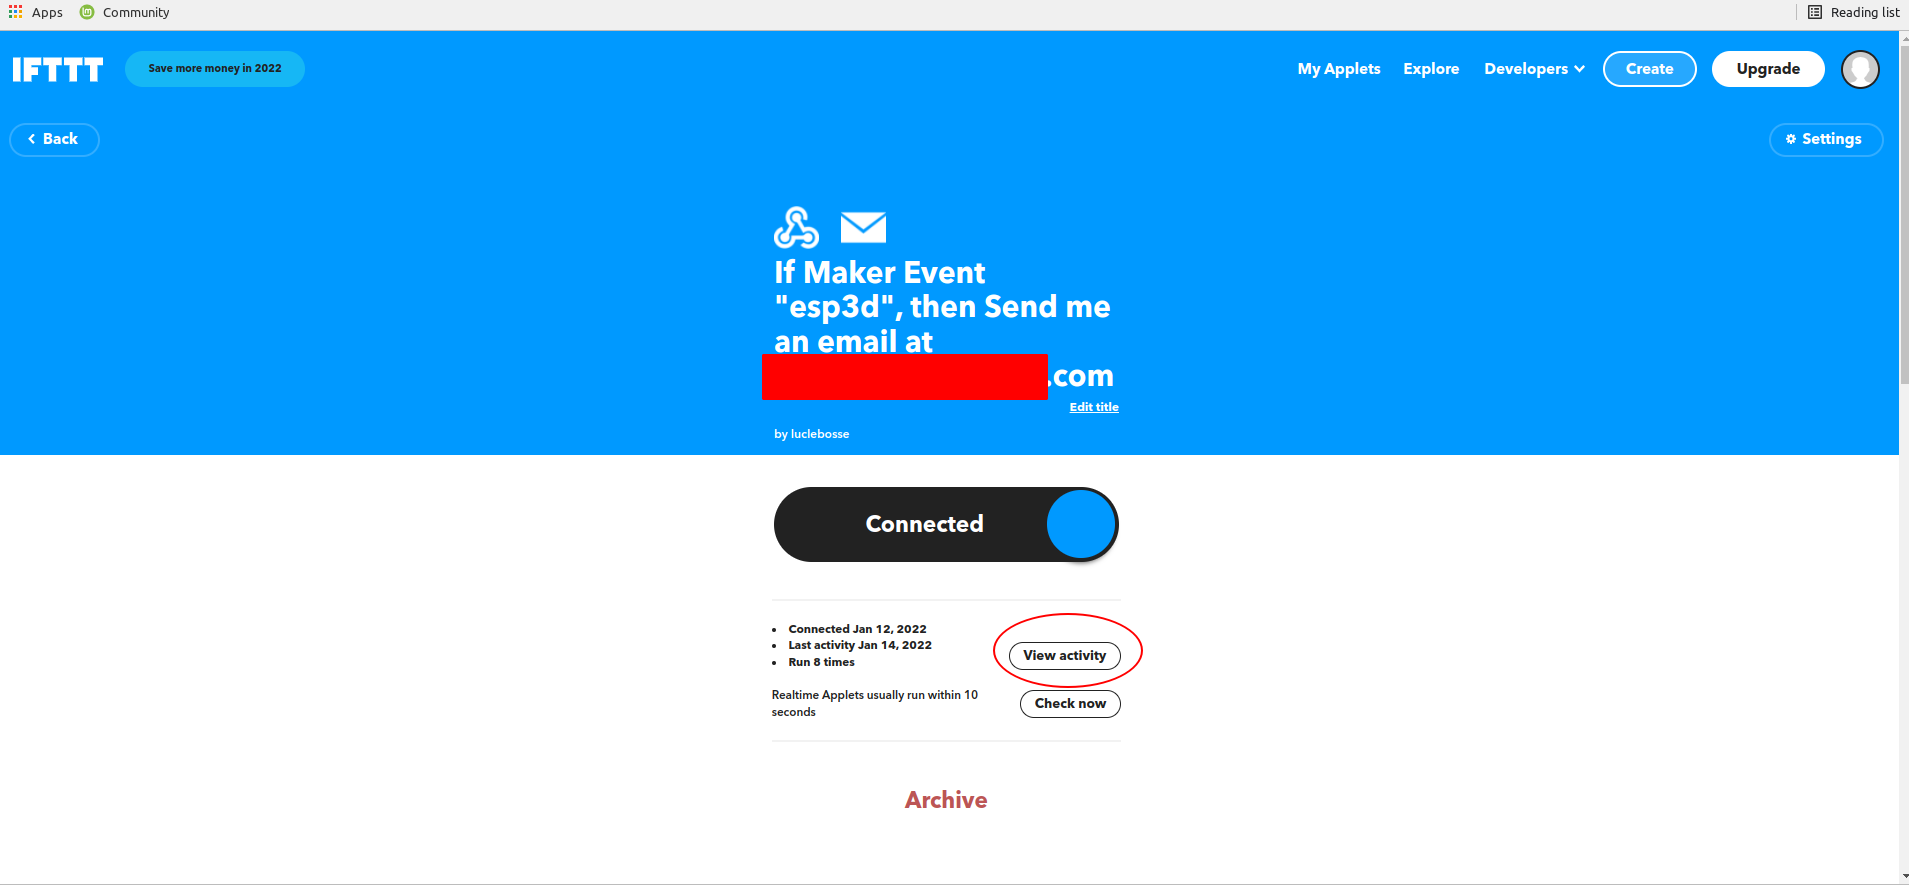
- Select the flow to display
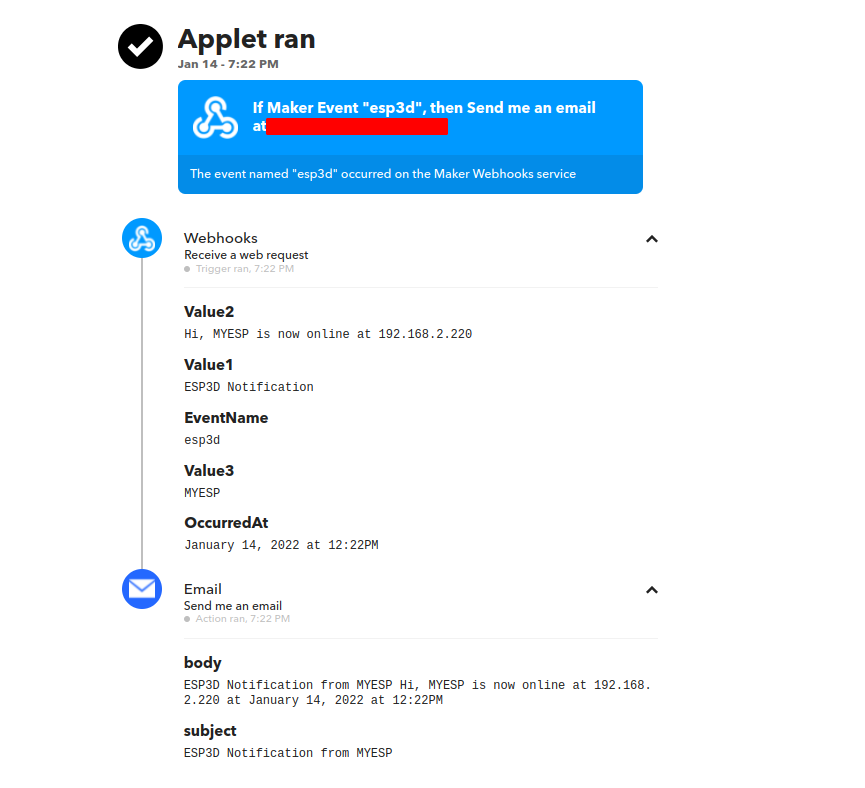
Note: This documentation is not exaustive due to huge features of IFTTT notifications service but base is always same :
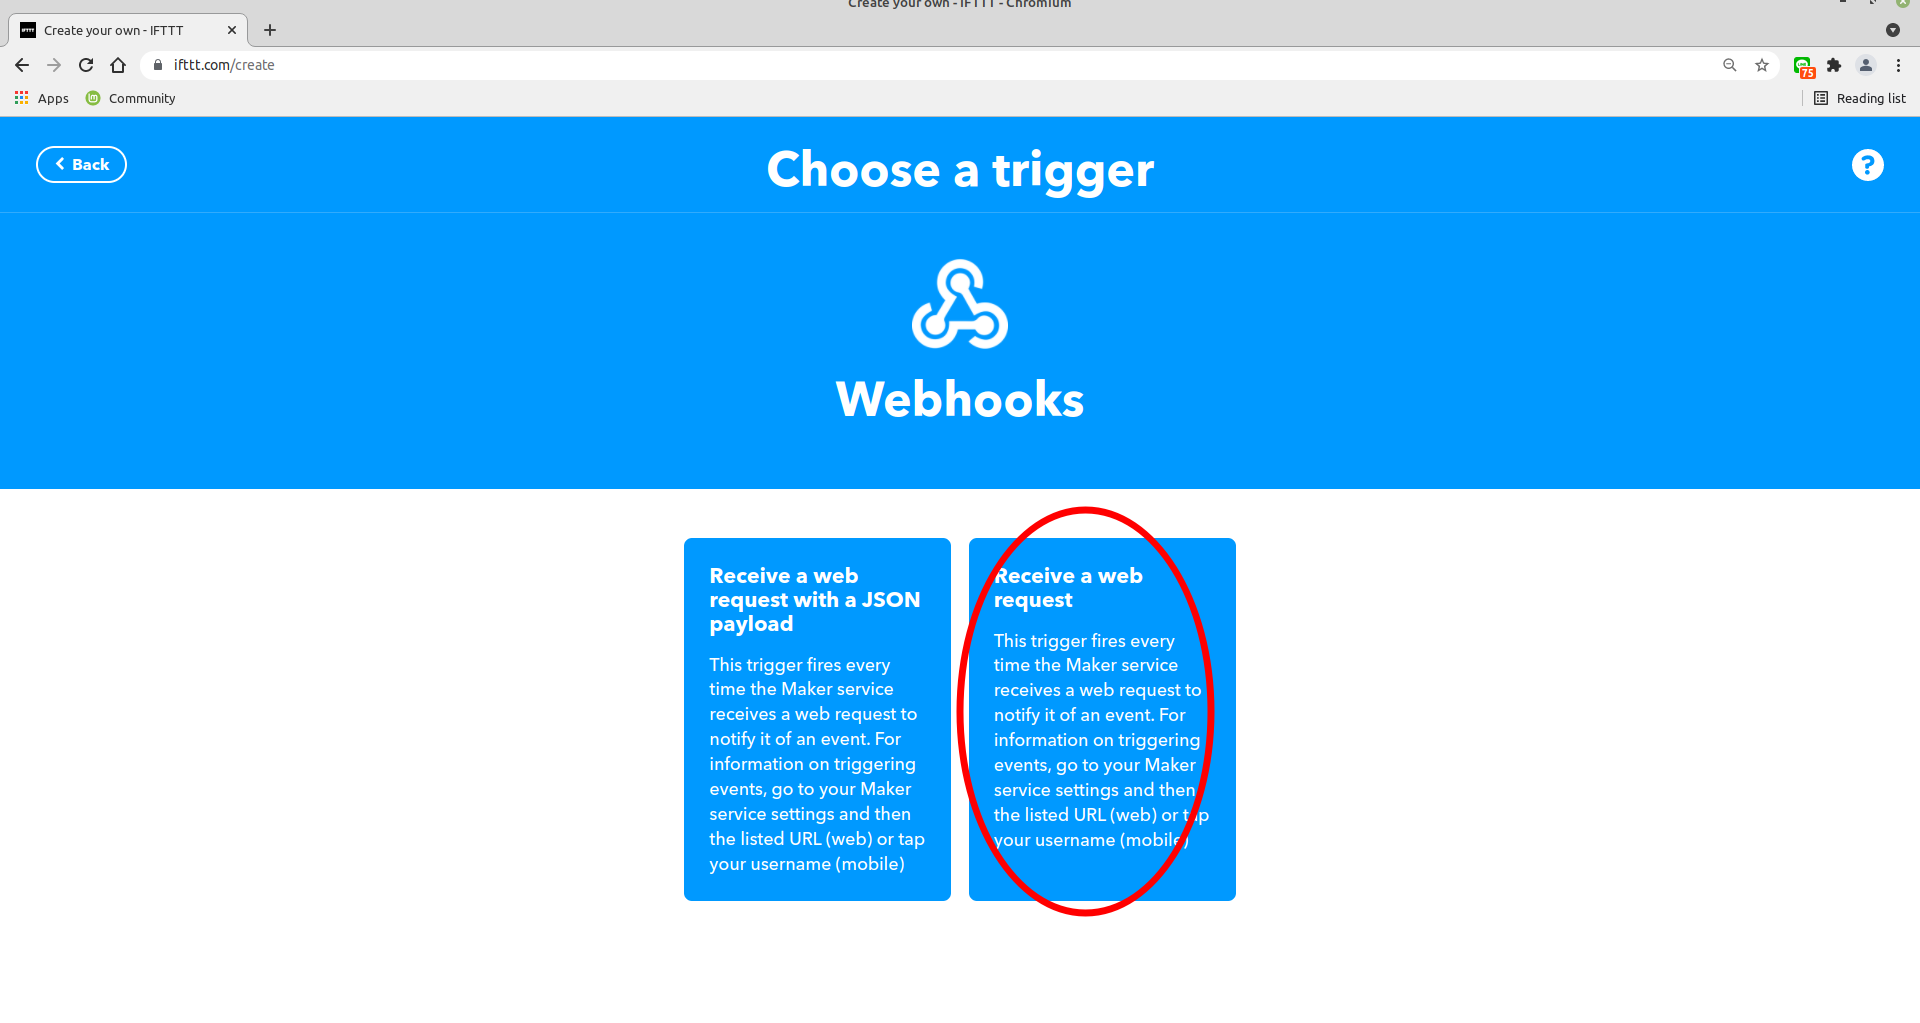
IFThis => webhooks based on webrequest
THENThat => IFTTT notification service
Telegram Notification
Telegram is free service
Considering you have Telegram account and you already installed Telegram on you phone/PC:
You need a bot token and a channel id:
1 - Create a bot with BotFather
- Open telegram application and open chat with Botfather.
- Type or select
/newbot
![image]/images/notifications/telegram/newbot.jpg)
- Type the name of the bot (2) and its username (3)

- Doing this you will get your bot token (4) that you need for
T1=<bot token>
2 - Create a public channel
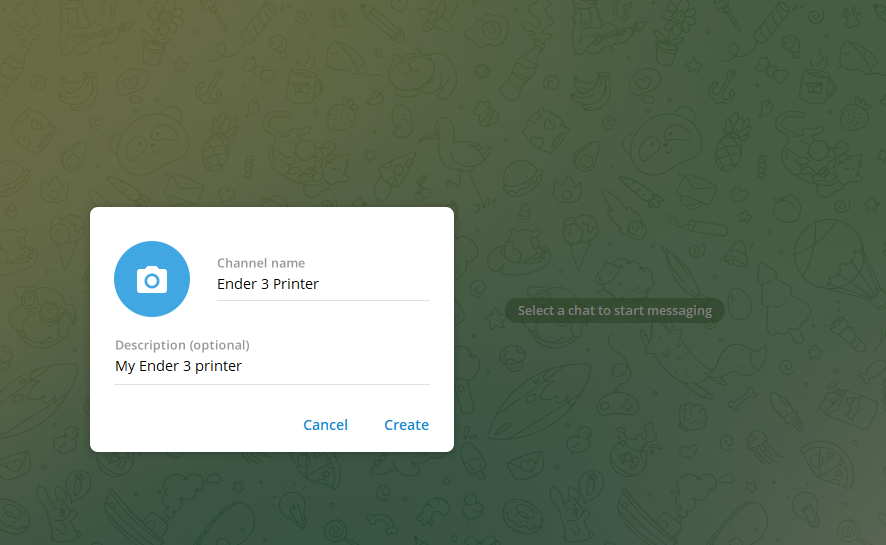
- In telegram select new channel
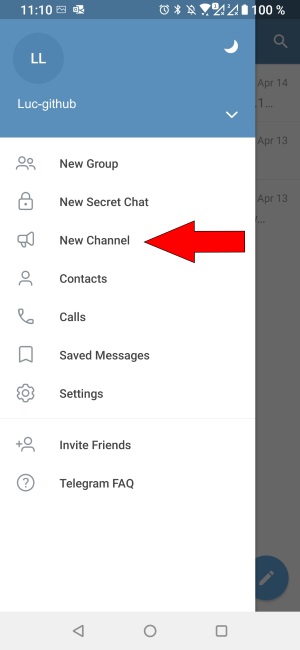
- Type channel name (1) and description (2)
- Make channel public and create your channelid/chatid
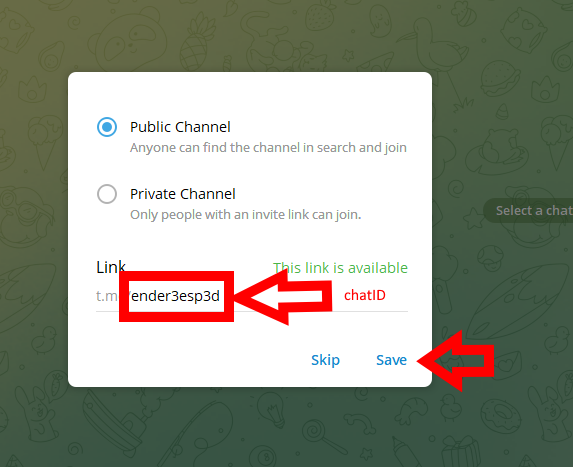
- Now you have your chatid without the
@
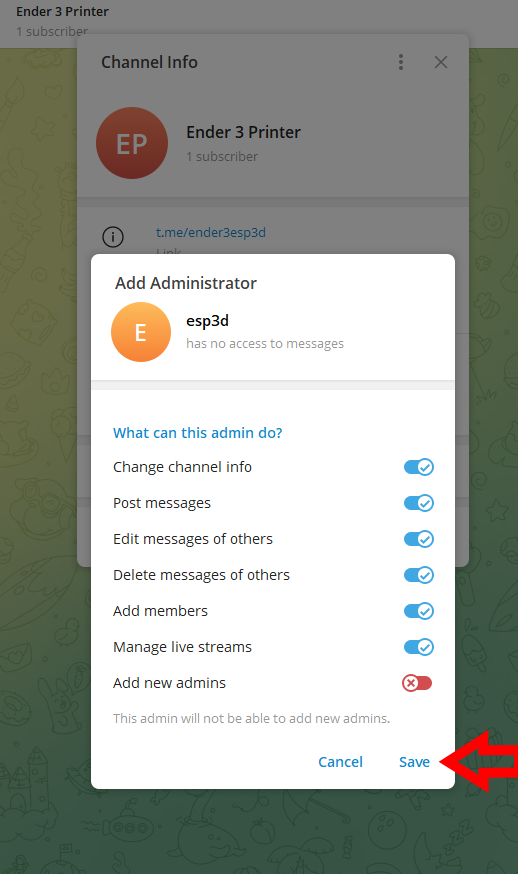
3 - Assign your bot as administrator of your channel so it can use it
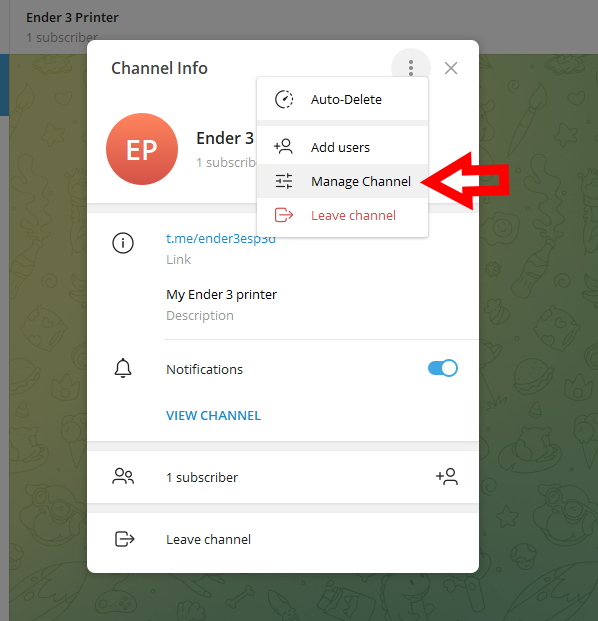
- Press your channel title, the top banner will expand
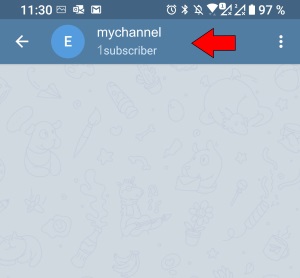
- Selet manage channel
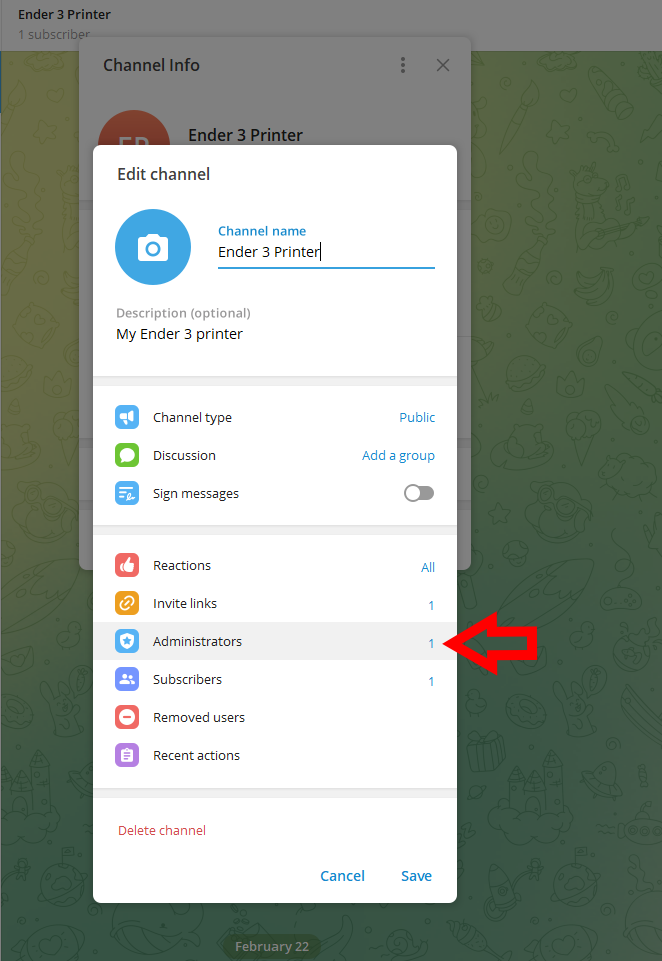
- Push Administrators
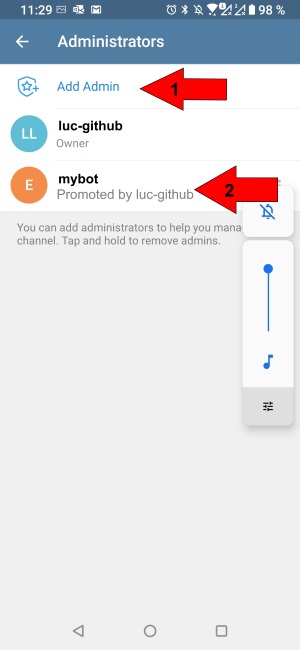
- Look for your bot in search and add it
- Validate bot can have access to channel
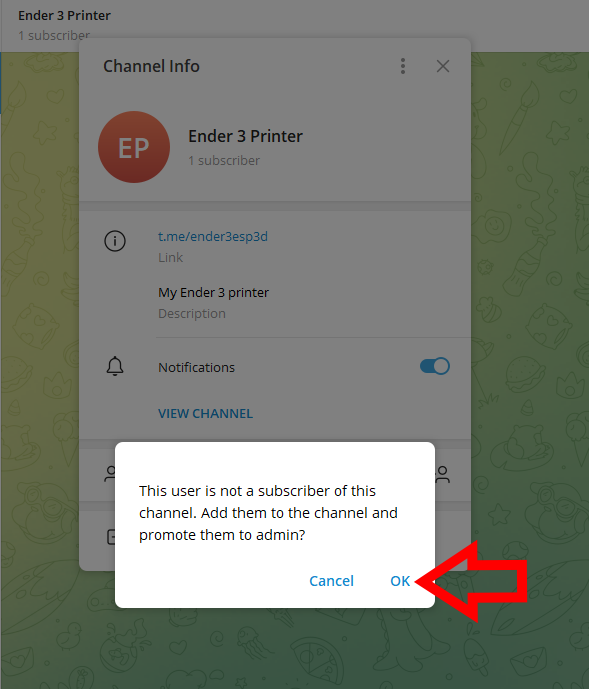
- Validate bot can admin the channel
4 - Save the generate token and chatID in ESP3D, and set Telegram as notification supplier
[ESP610]type=TELEGRAM T1=<bot token> T2=<@chatID>
5 - Type [ESP610] to verify (T1/T2 won’t be displayed)
6 - Try to send message:
[ESP600]Hi there, test from ESP3D