Subsections of API
Web Handlers
/ (GET)
root is the default handler where all files will be served, if no file is defined, it looks for index.html or index.html.gz (compressed)
if you call specific file, it will look for the filename and filename.gz (compressed)
if no file is defined and there is not index.html(.gz) it will display embedded page
another way to show the embedded page is /?forcefallback=yes
/sd/ (GET)
it will serve any file from SD card if there is one, it is only a wrapper to read SD card, no upload
/files (GET/POST)
this handler handle all commands for FS, including upload on FS.
possible options/arguments are:
quiet=yes can be used when you don’t want list files but just upload thempath=... define the path to the fileaction=... define the action to execute which can be:
- delete
delete the file defined by filename=... it will also use path=... to do full path
- deletedir
delete the directory defined by filename=... it will also use path=... to do full path
- createdir
create the directory defined by filename=... it will also use path=... to do full pathcreatePath=yes when doing upload and the path do not exists, it will create it, POST only<filename>S=... give the size of uploaded file with name, need to be set before file is set in upload, POST only
the output is a json file:
```json
{
    "files":[ //the files list
        {
            "name":"index.html.gz", //the name of the file
            "size":"83.46 KB", //the formated size of the file
            "time":"2022-09-04 11:56:05" //the time when the file was modified last time, this one is optional and depend on (FILESYSTEM_TIMESTAMP_FEATURE)
        },
        {
            "name":"subdir", //the name of the file / directory
            "size":"-1", //the size is -1 because it is a directory
            "time":"" //no time for directories optional as depend on (FILESYSTEM_TIMESTAMP_FEATURE)
        }
    ],
    "path":"/", //current path
    "occupation":"52", //% of occupation
    "status":"subdir created", //status
    "total":"192.00 KB", //Formated total space of Filesystem
    "used":"100.00 KB" //Formated used space of Filesystem
}
```
/sdfiles (GET/POST) )
this handler handle all commands for SD, including upload on SD (only shared and direct SD)
this handler handle all commands for FS, including upload on FS.
possible options/arguments are:
quiet=yes can be used when you don’t want list files but just upload thempath=... define the path to the fileaction=... define the action to execute which can be:
- list
Will refresh the stats of the files
- delete
delete the file defined by filename=... it will also use path=... to do full path
- deletedir
delete the directory defined by filename=... it will also use path=... to do full path
- createdir
create the directory defined by filename=... it will also use path=... to do full pathcreatePath=yes when doing upload and the path do not exists, it will create it, POST only<filename>S=... give the size of uploaded file with name, need to be set before file is set in upload, POST only
the output is a json file:
```json
{
    "files":[ //the files list
        {
            "name":"3Oc-pika2.gco",//the name of the file
            "shortname":"3Oc-pika2.gco", //the 8.3 shortname if available, if not the name of the file
            "size":"83.46 KB", //the formated size of the file
            "time":"2022-09-04 11:56:05" //the time when the file was modified last time, this one is optional and depend on (SD_TIMESTAMP_FEATURE)
        },
        {
            "name":"subdir", //the name of the file / directory
            "size":"-1", //the size is -1 because it is a directory
            "time":"" //no time for directories optional as depend on (SD_TIMESTAMP_FEATURE)
        }
    ],
    "path":"/", //current path
    "occupation":"52", //% of occupation
    "status":"subdir created", //status
    "total":"192.00 KB", //Formated total space of Filesystem
    "used":"100.00 KB" //Formated used space of Filesystem
}
```
/upload (POST)
this handler is for MKS boards using MKS communication protocol if enabled, it handle only upload on SD
/command (GET)
this handler is for all commands the parameter is cmd=...
if it is an [ESPXXX] command the answer is the [ESPXXX] response
if it is not an [ESPXXX] command the answer is ESP3D says: command forwarded and can be ignored
/login (GET/POST)
this handler is for authentication function if enabled
possible options/arguments are:
- DISCONNECT=YES
it will clear current session, remove authentication cookie, set status to disconnected and response code to 401
- SUBMIT=YES
to login it will need also PASSWORD=... and USER=..., the answer will be 200 if success and 401 if failed
if user is already authenticated it can use NEWPASSWORD=... instead of PASSWORD=... to change his password, if successful answer will be returned with code 200, otherwise code will be 500 if change failed or if password format is invalid
Output:
- if authentified and no submission:
{"status":"Identified","authentication_lvl":"admin"} and code 200
- if not authenticated and no submission:
{"status":"Wrong authentication!","authentication_lvl":"guest"} and code 401
/config (GET)
this handler is a shortcut to [ESP420] command in text mode, to get output in json add json=yes
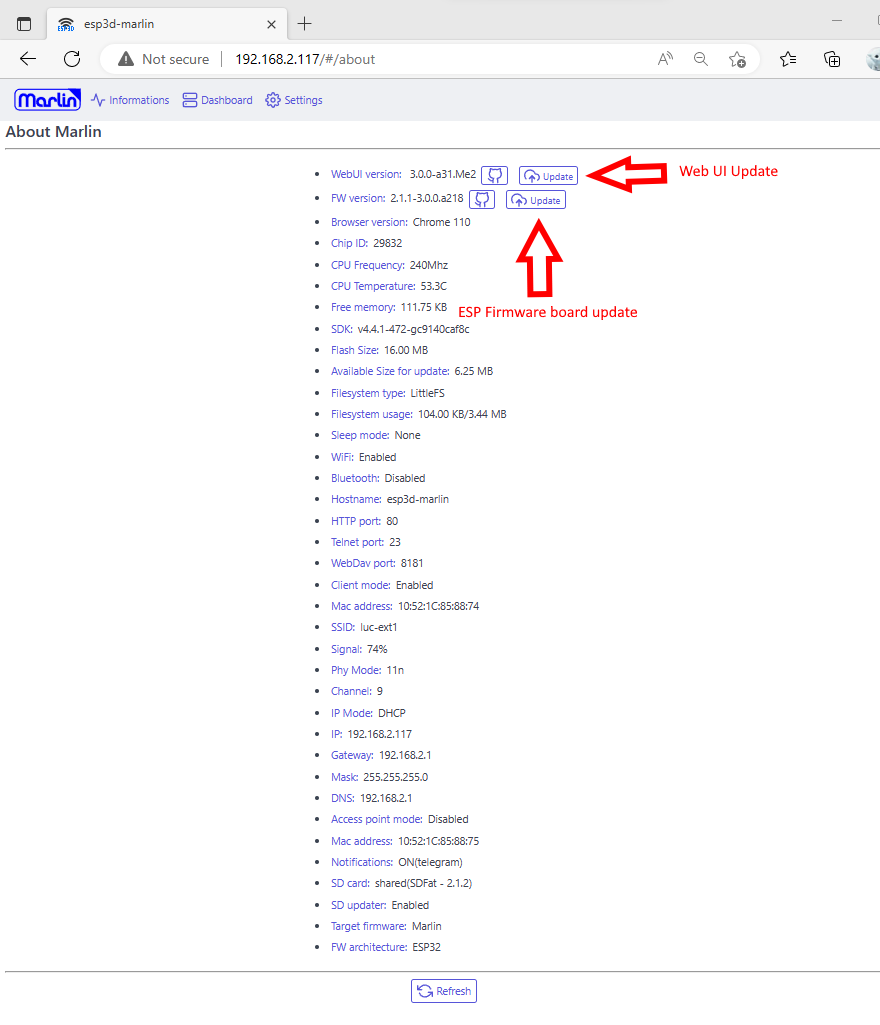
/updatefw (GET/POST)
this handler is for FW upload and update
Answer output is :
{"status":"..."} if upload is successful the ESP will restart
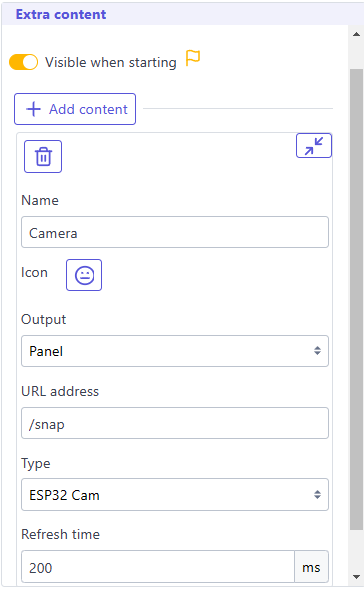
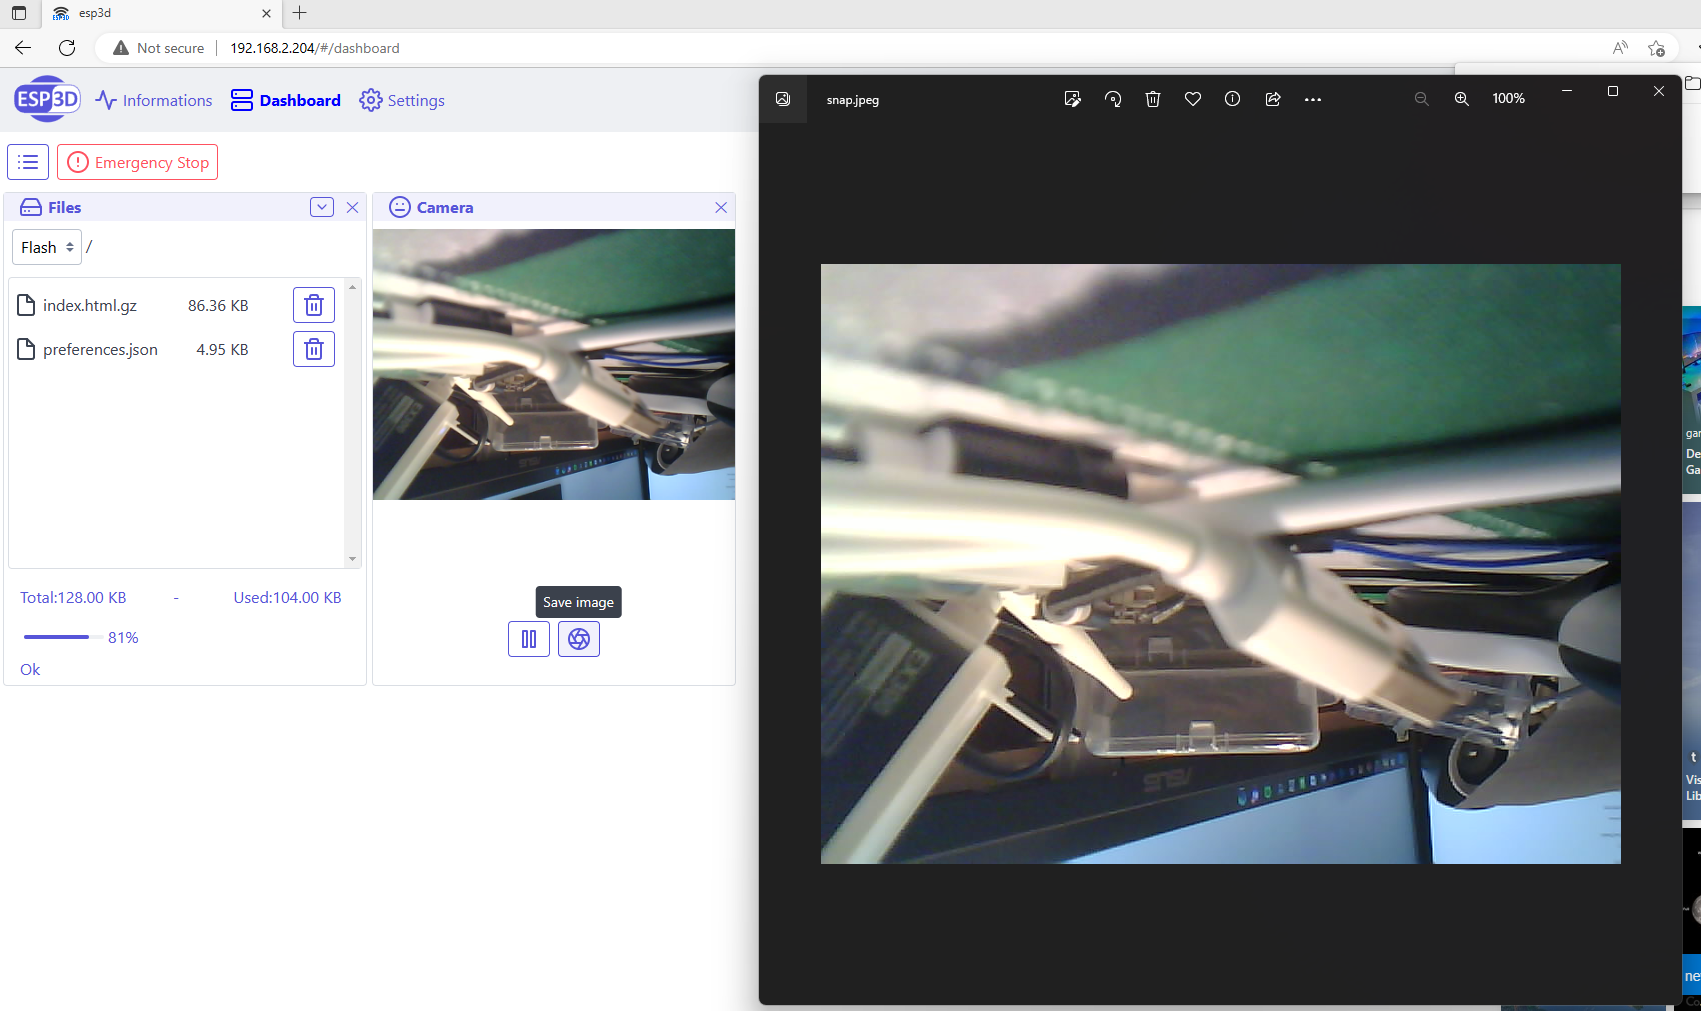
/snap (GET)
this handler is on esp32cam with camera enabled to capture a Frame
it answer by sending a jpg image
/description.xml (GET)
this handler is for SSDP if enabled to present device informations
<root xmlns="urn:schemas-upnp-org:device-1-0">
    <specVersion>
        <major>1</major>
        <minor>0</minor>
    </specVersion>
    <URLBase>http://192.168.2.178:80/</URLBase>
    <device>
        <deviceType>urn:schemas-upnp-org:device:upnp:rootdevice:1</deviceType>
        <friendlyName>esp3d</friendlyName>
        <presentationURL>/</presentationURL>
        <serialNumber>52332</serialNumber>
        <modelName>ESP Board</modelName>
        <modelDescription/>
        <modelNumber>ESP3D 3.0</modelNumber>
        <modelURL>https://www.espressif.com/en/products/devkits</modelURL>
        <manufacturer>Espressif Systems</manufacturer>
        <manufacturerURL>https://www.espressif.com</manufacturerURL>
        <UDN>uuid:38323636-4558-4dda-9188-cda0e600cc6c</UDN>
        <serviceList/>
        <iconList/>
    </device>
</root>
Captive portal bypass handlers
to avoid a redirect to index.html and so a refresh of the page, some classic handler have been added so they all go to / handler actually
- /generate_204
- /gconnectivitycheck.gstatic.com
- /fwlink/
Web Sockets
there are 2
Terminal websocket
use subprotocol webui-v3 the port depend on the firmware, please refer to the firmware documentation
text mode
Reserved
messages between webui / ESP
Format: <label>:<message>
-
from ESP to WebUI
-
currentID:<id>
Sent when client is connecting, it is the last ID used and become the active ID
-
activeID:<id>
Broadcast current active ID, when new client is connecting, client without this is should close, ESP WS Server close all open WS connections but this one also
-
PING:<time left>:<time out>
It is a response to PING from client to inform the time left if no activity (see below)
-
ERROR:<code>:<message>
If an error raise when doing upload, it informs client it must stop uploading because sometimes the http answer is not possible,
or cannot cancel the upload, this is a workaround as there is no API in current webserver to cancel active upload
-
NOTIFICATION:<message>
Forward the message sent by [ESP600] to webUI toast system
-
SENSOR: <value>[<unit>] <value2>[<unit2>] ...
The sensor connected to ESP like DHT22
-
from WebUI to ESP
PING:<current cookiesessionID / none > if any, or “none” if none
binary mode
Reserved
Data websocket
use sub protocol arduino the port depend on the firmware, please refer to the firmware documentation
text mode
This mode is used to transfert all GCODE commands and their answers from printer/cnc
binary mode
This mode is used to transfert files to / from esp board (not implemented yet)
it use frame of 1024 bytes, can be increased after test
the frame format is :
2 bytes: for frame type
2 bytes: for frame size to check some integrity, currently as already part of frame no checksume is used
x bytes : extra data according frame type
Frame types
Query status frame
type: client -> esp
Status Request
with hexadecimal values:
Response frame use inverted header:
Response Status
with hexadecimal values:
the first byte of answer is the state
| Code |
Hexa |
Meaning |
B |
0x42 |
busy |
O |
0x4F |
idle/ok |
E |
0x45 |
error |
A |
0x41 |
abort |
D |
0x44 |
download ongoing |
U |
0x55 |
upload ongoing |
extra data may be added :
For Error:
error code and string,
1 byte : error code: 0->255
1 byte : string size 0->255
XX bytes for the string
For Upload:
Upload informations:
1 byte : path size 0->255
XX bytes : the path string
1 byte : the filename size 0->255
xx bytes : filename string
4 bytes : total file size
4 bytes : currently processed bytes
4 bytes : last packet id processed
R |
S |
x |
x |
U |
X |
.. |
.. |
X |
.. |
.. |
S1 |
S1 |
S1 |
S1 |
S2 |
S2 |
S2 |
S2 |
For Download:
Download informations:
1 byte : path size 0->255
XX bytes : the path string
1 byte : the filename size 0->255
xx bytes : filename string
4 bytes : total file size
4 bytes : currently processed bytes
4 bytes : last packet id processed
R |
S |
x |
x |
D |
X |
.. |
.. |
X |
.. |
.. |
S1 |
S1 |
S1 |
S1 |
S2 |
S2 |
S2 |
S2 |
Start upload frame
header is :
the content is:
1 byte : path size 0->255
XX bytes : the path string
1 byte : the filename size 0->255
xx bytes : filename string
4 bytes : total file size
S |
U |
x |
x |
D |
X |
.. |
.. |
X |
.. |
.. |
S1 |
S1 |
S1 |
S1 |
if answer is :
it means transfert can start
Transfert upload frame
header is :
U |
P |
x |
x |
ID |
ID |
ID |
ID |
.. |
.. |
4 bytes is packet id
XXXX bytes is data
if packet is received the answer is
Start dowload frame
header is :
the content is:
1 byte : path size 0->255
XX bytes : the path string
1 byte : the filename size 0->255
xx bytes : filename string
4 bytes : total file size
S |
D |
x |
x |
D |
X |
.. |
.. |
X |
.. |
.. |
S1 |
S1 |
S1 |
S1 |
if answer is :
it means transfert can start
Transfert download frame
header is :
D |
P |
x |
x |
ID |
ID |
ID |
ID |
.. |
.. |
4 bytes is packet id
XXXX bytes is data
if packet is received the answer is
Command frame
header is :
Commands:
| Code |
Hexa |
Meaning |
A |
0x41 |
abort |
Abort command frame
Variables list
Several variables are available depending WebUI target
CNC
-
From output:
-
[PRB:0.000,0.000,0.000:0]
#prb_x#, #prb_y#,#prb_z#
optional according axis definition #prb_a#,#prb_b#,#prb_c#
-
from ? report MPos:0.000,0.000,0.000,0.000,0.000,0.000
#pos_x#, #pos_y#, #pos_z#, #pos_a#, #pos_b#, #pos_c#,
#pos_wx#, #pos_wy#, #pos_wz#, #pos_wa#, #pos_wb#, #pos_wc#,
optional according axis definition #pos_u#,#pos_v#,#pos_w#, #pos_wu#,#pos_wv#,#pos_ww#
Note: if variable is unknown, then it is set to 0
Real time commands
Real time commands are not printable commands most of the time so it can be tricky to type them in terminal or to see them in terminal as echo. To workaround this you can use and see the text equivalent variables
grbl
- 0x18 (ctrl-x) : Soft-Reset : #SOFTRESET#
- 0x84 : Safety Door #SAFETYDOOR#
- 0x85 : Jog Cancel #JOGCANCEL#
Feed Overrides
- 0x90 : Set 100% of programmed rate. #FO100#
- 0x91 : Increase 10% #FO+10#
- 0x92 : Decrease 10% #FO-10#
- 0x93 : Increase 1% #FO+1#
- 0x94 : Decrease 1% #FO-1#
Rapid Overrides
- 0x95 : Set to 100% full rapid rate. #RO100#
- 0x96 : Set to 50% of rapid rate. #RO50#
- 0x97 : Set to 25% of rapid rate. #RO25#
Spindle Speed Overrides 10%->200%
- 0x99 : Set 100% of programmed spindle speed #SSO100#
- 0x9A : Increase 10% #SSO+10#
- 0x9B : Decrease 10% #SSO-10#
- 0x9C : Increase 1% #SSO+1#
- 0x9D : Decrease 1% #SSO-1#
Toggle commands
- 0x9E : Toggle Spindle Stop #T-SPINDLESTOP#
- 0xA0 : Toggle Flood Coolant #T-FLOODCOOLANT#
- 0xA1 : Toggle Mist Coolant #T-MISTCOOLANT#
grblHAL
- 0x18 (ctrl-x) : Soft-Reset : #SOFTRESET#
- 0x80 : Instead of ? for requesting a real-time report #STATUSREPORT#
- 0x81 : Instead of ~ for requesting cycle start #CYCLESTART#
- 0x82 : Instead of ! for requesting feed hold “#FEEDHOLD#
- 0x83 : Request parser state report #PARSERREPORT#
- 0x84 : Safety Door #SAFETYDOOR#
- 0x85 : Jog Cancel #JOGCANCEL#
- 0x87 : Request a complete real-time report #COMPLETEREPORT#
- 0x88 : Toggle the virtual optional stop switch #T-STOPSWITCH#
Feed Overrides
- 0x90 : Set 100% of programmed rate. #FO100#
- 0x91 : Increase 10% #FO+10#
- 0x92 : Decrease 10% #FO-10#
- 0x93 : Increase 1% #FO+1#
- 0x94 : Decrease 1% #FO-1#
Rapid Overrides
- 0x95 : Set to 100% full rapid rate. #RO100#
- 0x96 : Set to 50% of rapid rate. #RO50#
- 0x97 : Set to 25% of rapid rate. #RO25#
Spindle Speed Overrides 10%->200%
- 0x99 : Set 100% of programmed spindle speed #SSO100#
- 0x9A : Increase 10% #SSO+10#
- 0x9B : Decrease 10% #SSO-10#
- 0x9C : Increase 1% #SSO+1#
- 0x9D : Decrease 1% #SSO-1#
Toggles and extras
- 0x9E : Toggle Spindle Stop #T-SPINDLESTOP#
- 0xA0 : Toggle Flood Coolant #T-FLOODCOOLANT#
- 0xA1 : Toggle Mist Coolant #T-MISTCOOLANT#
- 0xA2 : Request a PID report #PIDREPORT#
- 0xA3 : Acknowledge a tool change request #TOOLCHANGE#
- 0xA4 : Toggle the virtual optional probe connected switch #T-PROBE#
Syntax conventions
Info
This document is a receipe of conventions that may not be currently implemented yet, but will be from now, current code will be updated according to it before beta state.
Style should be also applied also
Javascript
Style
- Install prettier extension
`Prettier - Code formatter from Prettier
- Define configuration file
Select
.prettierrc is present on root directory
General
- Use DOM as much as possible, do not use
document.getElementById
- Avoid switch statement, use object with corresponding method instead
- Native HTML tags must be lowercased
File name
- Use one file or directory per main component
- Split compoment as much as possible in multiple components
- Use same file name as component name
- If file does not contain components first letter of file name should be lower case
- JSON file name / directory are lower case
Variable
- The first character of name should be lowercase.
- Use upper case letter as word separator
- Any name should begin with an alphabet.
- Digits may be used in the name but only after the alphabet.
- No special symbols / keywords can be used in names
Constant
- The first character of name should be lowercase.
- Use upper case letter as word separator
- Any name should begin with an alphabet.
- Digits may be used in the name but only after the alphabet.
- No special symbols / keywords can be used in names
JSON object
- Start name by upper case first letter
- Use upper case first letter for words separation
- Do not use underscore / dash in name
Component
- Do not use class / render but Fragments / Elements
- Start name by upper case first letter
- Use upper case first letter for words separation
- Do not use underscore / dash in name
- Only export what is needed
Function/Procedure
- The first character of name should be lowercase if more than one letter, or should be upper case.
- Use upper case letter as word separator.
- Any name should begin with an alphabet.
- Digits may be used in the name but only after the alphabet.
- No special symbols / keywords can be used in names
Inspired from :
File upload
The file upload is done using a multipart form data POST request.
------WebKitFormBoundaryYz6fcTCJfjQG8Wp6
Content-Disposition: form-data; name="path"

/
------WebKitFormBoundaryYz6fcTCJfjQG8Wp6
Content-Disposition: form-data; name="/8822552.jpgS"

3308
------WebKitFormBoundaryYz6fcTCJfjQG8Wp6
Content-Disposition: form-data; name="/8822552.jpgT"

2022-08-24T20:17:30
------WebKitFormBoundaryYz6fcTCJfjQG8Wp6
Content-Disposition: form-data; name="myfiles"; filename="/8822552.jpg"
Content-Type: image/jpeg


------WebKitFormBoundaryYz6fcTCJfjQG8Wp6--
All parameters are sent before the file data itself.
For each file:
The path parameter (required)
The path parameter is the path where the file will be uploaded. It is an absolute path starting from the root of the filesystem and do not contain the filename.
The file size parameter (optional but recommended)
The file size parameter is the size of the file to upload. It is used to check if the file can be uploaded and is used to check if the file is fully uploaded.
The argument name is the full file path with filename with a S suffix.
The value is the size of the file in bytes.
The file time parameter (optional)
The file time parameter is the last modified time of the file to upload. It is optional but allow to set right time on file on ESP that has not time synchronization.
The argument name is the full file path with filename with a T suffix.
The value format is ISO 8601 (YYYY-MM-DDThh:mm:ss) without timezone.
The file data binary (required)
The file data binary is the file data itself. It is the last parameter of the multipart form data POST request, and it also contains the full file name.
Extensions API
Basic code
<script type="text/javascript">

//Send message to web ui
function sendMessage(msg){
    window.parent.postMessage(msg, '*');
}

//Process Message coming from webUI
function processMessage(eventMsg){
    //now process eventMsg.data
}

//Setup message listener from webUI
window.onload = (event) => {
  window.addEventListener("message", processMessage, false);
};

</script>

<div class="container">
Display your HTML here
</div>
As you can see code is minimal - it will fit a Frame, webui css / theme will be added by webUI after loaded, so you do not need to add any, you can use any of existing class available in webUI.
Communication between frame and main window is done by messages using objects (string / array based), do not use any object that could ne be cloned or loading will fail.
Send message
message structure used by window.parent.postMessage(msg, '*'); has a defined format, some parameters are madatories, some are optionals and some depend on message type:
{type:'<message type>', target:'webui', id:'[origin]', noDispatch:[true], XXX:YYY}
<message type> is mandatory, it define the purpose of the message
target:'webui' is mandatory, it help to screen the message
id:'[origin]' is optionnal, it define which id must read the response if any, if present it can be used by extension to filter message, no id means the message is for everyone
noDispatch:[true] is optionnal, if true it will prevent to send answer if any, if not or set to false, it will send answer message if any
XXX:YYY are optionals/mandatories according message type
Send GCODE command or ESP command
Example: {type:'cmd', target:'webui',id:'terminal', content:'[ESP111]'}
type is cmd (mandatory)
target is webui (mandatory)
id is terminal (optional)
content is the command that need to be sent, in our case [ESP111] (mandatory)
Note: there is no noDispatch:true so answer, if any from ESP firmware, will be sent
Note 2: there is no way to prevent the answer to be spread if it come from external board from serial, even if id and noDispatch are set
Send web query
Example: {type:'query', target:'webui', id:'filemanager', url:'files', args:{action:'list', path:'/'}}
type is query (mandatory)
target is webui (mandatory)
id is terminal (optional)
url is the base url in our case files for /files (mandatory)
args is the set of arguments url in our case {action:'list', path:'/'} for /files?action=list&path=/ (optional for query)
Note: noDispatch:true and id:'term' are applicable in this case if needed
- Answer format: check the
eventMsg.data
-
if success
{
    "type": "query",
    "response": {
        "status": "success",
        "response": "{\"files\":[{\"name\":\"config.yaml\",\"size\":\"1.55 KB\"}],\"path\":\"/\",\"occupation\":\"35\",\"status\":\"ok\",\"total\":\"1.31 MB\",\"used\":\"470.08 KB\"}",
        "initiator": {
                        "type": "query",
                        "target": "webui",
                        "id": "filemanager",
                        "url": "files",
                        "args": {
                                    "action": "list",
                                    "path": "/"
                                }
                    }
    },
    "id": "filemanager"
}
type is query
id is the id set in output message to help to screen
content has the response’s status which is success, the response it self response, in our case a JSON, and also the initiator is the initial command for reference
-
if error
{
    "type": "query",
    "response": {
        "status": "error",
        "error": "Cannot connect",
        "initiator": {
                        "type": "query",
                        "target": "webui",
                        "id": "filemanager",
                        "url": "files",
                        "args": {
                                    "action": "list",
                                    "path": "/"
                                }
                    }
    },
    "id": "filemanager"
}
type is query
id is the id set in output message to help to screen
content has the response’s status which is error, and the error it self error, in our case Cannot connect and also the initiator is the initial command for reference
Send web upload
Example: {type:'upload', target:'webui', id:'filemanager', url:'files', content:[...],size:500, path:"/", filename:'file.txt'}
type is upload (mandatory)
target is webui (mandatory)
id is filemanager (optional)
url is the base url in our case files for /files (mandatory for upload)
content is the file in an array object (mandatory)
size is the file size (mandatory)
path is the file target path (not including name) (mandatory)
size is the filename (not including path) (mandatory)
args is an object with optional arguments like for query, they are no used in post but in url itself
Note: noDispatch:true and id:'filemanager' are applicable in this case if needed
- Answer format: check the
eventMsg.data
for upload the initiator does not contain the file content
-
if success
{
    "type": "upload",
    "response": {
        "status": "success",
        "response": "{\"files\":[{\"name\":\"config.yaml\",\"size\":\"1.55 KB\"},{\"name\":\"file.txt\",\"size\":\"500B\"}],\"path\":\"/\",\"occupation\":\"35\",\"status\":\"ok\",\"total\":\"1.31 MB\",\"used\":\"470.08 KB\"}",
        "initiator": {
                        "type":"upload",
                        "target":"webui",
                        "id":"filemanager",
                        "url":"files",
                        "size":500,
                        "path":"/",
                        "filename":"file.txt"
                    }
    },
    "id": "filemanager"
}
type is upload
id is the id set in output message to help to screen
content has the response’s status which is success, the response it self response, in our case a JSON, and also the initiator is the initial command for reference but without the file content
-
progression message
{
    "type": "upload",
    "response": {
        "status": "progress",
        "progress": "100",
        "initiator": {
                        "type":"upload",
                        "target":"webui",
                        "id":"filemanager",
                        "url":"files",
                        "size":500,
                        "path":"/",
                        "filename":"file.txt"
                    }
    },
    "id": "filemanager"
}
type is upload
id is the id set in output message to help to screen
content has the response’s status which is progress, and the progression it self progress, in our case 100 = 100% and also the initiator is the initial command for reference but without the file content
-
if error
{
    "type": "upload",
    "response": {
        "status": "error",
        "error": "Cannot connect",
        "initiator": {
                        "type":"upload",
                        "target":"webui",
                        "id":"filemanager",
                        "url":"files",
                        "size":500,
                        "path":"/",
                        "filename":"file.txt"
                    }
    },
    "id": "filemanager"
}
type is upload
id is the id set in output message to help to screen
content has the response’s status which is error, and the error it self error, in our case Cannot connect and also the initiator is the initial command for reference but without the file content
Send webdownload request
Example: {type:'download', target:'webui', id:'filemanager', url:'preferences.json'}
type is download (mandatory)
target is webui (mandatory)
id is filemanager (optional)
url is the url of the file in our case preferences.json for /preferences.json (mandatory)
args is an object with optional arguments like for query
Note: id:'filemanager' is applicable in this case if needed, but not noDispatch:true as the purpose is to get response
- Answer format: check the
eventMsg.data
-
if success
{
    "type": "download",
    "response": {
        "status": "success",
        "response": [...],
        "initiator": {
                        "type":"download",
                        "target":"webui",
                        "id":"filemanager",
                        "url":"preferences.json",
                    }
    },
    "id": "filemanager"
}
type is upload
id is the id set in output message to help to screen
content has the response’s status which is success, the response it self response, in our case a blob which is the file that need to be read properly, and also the initiator is the initial command for reference
-
progression message
{
    "type": "upload",
    "response": {
        "status": "progress",
        "progress": "100",
        "initiator": {
                        "type":"upload",
                        "target":"webui",
                        "id":"filemanager",
                        "url":"preferences.json",
                    }
    },
    "id": "filemanager"
}
type is download
id is the id set in output message to help to screen
content has the response’s status which is progress, and the progression it self progress, in our case 100 = 100% and also the initiator is the initial command for reference
-
if error
{
    "type": "download",
    "response": {
        "status": "error",
        "error": "404",
        "initiator": {
                        "type":"upload",
                        "target":"webui",
                        "id":"filemanager",
                        "url":"preferences.json",
                    }
    },
    "id": "filemanager"
}
type is download
id is the id set in output message to help to screen
content has the response’s status which is error, and the error it self error, in our case 404 (file not found) and also the initiator is the initial command for reference
Send sound notification
There is no answer for this message, so id is not necessary
-
Generate a beep notification
Example: {type:'sound', target:'webui', content:'beep'}
type is `` (mandatory)
target is webui (mandatory)
sound is the sound type, in our case beep (mandatory)
-
Generate a beep error notification
Example: {type:'sound', target:'webui', content:'error'}
type is `` (mandatory)
target is webui (mandatory)
sound is the sound type, in our case error (mandatory)
-
Generate a beep sequence notification
Example: {type:'sound', target:'webui', content:'beep', seq:[{ f: 1046, d: 200 },{ f: 1318, d: 100 }]}
type is `` (mandatory)
target is webui (mandatory)
sound is the sound type, in our case seq (mandatory)
seq is an array of sequence of beep, in our case [{ f: 1046, d: 200 },{ f: 1318, d: 100 }] (mandatory), f is frequency and d is duration of the beep
Send toast notification
There is no answer for this message, so id is not necessary
-
Generate a success toast notification
Example: {type:'toast', target:'webui', content:{text:'This is a success', type:'success'}}
type is `` (mandatory)
target is webui (mandatory)
content has the toast type, in our case success, and the text to display, in ou case This is a success (mandatory)
-
Generate an error toast notification
Example: {type:'toast', target:'webui', content:{text:'This is an error', type:'error'}}
type is `` (mandatory)
target is webui (mandatory)
content has the toast type, in our case error, and the text to display, in ou case This is an error (mandatory)
-
Generate a normal toast notification
Example: {type:'toast', target:'webui', content:{text:'This is a toast', type:'default'}}
type is `` (mandatory)
target is webui (mandatory)
content has the toast type, in our case default, and the text to display, in ou case This is a toast (mandatory)
Send translation request
-
simple translation
Example: {type:'translate', target:'webui', id:'transpanel', content:'S153'}
type is translate (mandatory)
target is webui (mandatory)
id is transpanel (optional)
content is the text that need to be translated, in our case S153 (mandatory)
-
Answer format: check the eventMsg.data
{
    "type": "translate",
    "content": {
        "response": "Your session will end soon, do you want to stay connected ?",
        "initiator": {
                        "type":"translate",
                        "target":"webui",
                        "id":"transpanel",
                        "content":"S153"
                    }
    },
    "id": "transpanel"
}
type is translate
id is the id set in command message to help to screen
content has the response it self response, in our case Your session will end soon, do you want to stay connected ? and also the initiator is the initial command for reference
-
full dump of translations
Example: {type:'translate', target:'webui', id:'transpanel', all:'true'}
type is translate (mandatory)
target is webui (mandatory)
id is transpanel (optional)
all to take all translations (mandatory)
-
Answer format: check the eventMsg.data
{
    "type": "translate",
    "content": {
        "response": "Your session will end soon, do you want to stay connected ?",
        "initiator": {
                        "type":"translate",
                        "target":"webui",
                        "id":"transpanel",
                        "content":[....]
                    }
    },
    "id": "transpanel"
}
type is translate
id is the id set in command message to help to screen
content has the response it self response, in our case an array of all translations and also the initiator is the initial command for reference
Send capabilities request
Example: {type:'capabilities', target:'webui', id:'transpanel'}
type is capabilities (mandatory)
target is webui (mandatory)
id is infopanel (optional)
-
Answer format: check the eventMsg.data
{
    "type": "capabilities",
    "content": {
        "response": "Your session will end soon, do you want to stay connected ?",
        "initiator": {
                        "type":"capabilities",
                        "target":"webui",
                        "id":"infopanel"
                    }
    },
    "id": "infopanel"
}
type is capabilities
id is the id set in command message to help to screen
content has the response it self response, in our case a JSON and also the initiator is the initial command for reference
Dispatch message to other extensions
Example: {type:'dispatch', target:'webui', id:'senderpanel', content:'any message' , targetid:'receiverpanel'}
type is dispatch (mandatory)
target is webui (mandatory)
id is senderpanel (optional)
content the message to dispatch using
Note: there no answer as the purpose of this is to send answer
Send Modal dialog display request
-
Simple modal
Example: {type:'modal', target:'webui', id:'modalpanel', content:{title:'This is tile', id:'simple_modal', style:'default', bt1Txt:'S126', response1:'ok', text:'some text', overlay:true}}
type is modal (mandatory)
target is webui (mandatory)
id is modalpanel (optional)
content is modal deescription:
- title of the modal (mandatory),
This is tile is used as example but you better use predefined text that could be translated
- id is modal id (mandatory), here
simple_modal
- style is modal style (mandatory), for simple modal it is
default,
- bt1Txt is the text to show on button 1 (optional),
S126 will be translated as Ok, if not defined button won’t be displayed
- response1 is the message sent if button 1 is clicked (optional), here
ok, the click close the modal
- bt2Txt is the text to show on button 2 (optional), if not defined button won’t be displayed
- response2 is the message sent if button 2 is clicked (optional), the click close the modal
- hideclose if set and true it will hide the cross button to close the modal (optional)
- overlay if set and true it will automatically close modal if modal loose focus (optional)
- text display the text in modal, if it is predefined’s one it will be translated (optional)
Note: close button and overlay feature won’t send any notification when modal is closed, be aware of it
-
Answer format: check the eventMsg.data
{
    "type": "modal",
    "content": {
        "response": "ok",
        "initiator": {
                        type:'modal',
                        target:'webui',
                        id:'modalpanel',
                        content : {
                                    "title":"This is tile",
                                    "id":"simple_modal",
                                    "style":"default",
                                    "bt1Txt":"S126",
                                    "response1":"ok",
                                    "text":"some text",
                                    "overlay":true
                                  }
                     }
    },
    "id": "modalpanel"
}
type is modal
id is the id set in command message to help to screen
content has the response it self response, in our case ok because only one button, and also the initiator is the initial command for reference
-
Confirmation modal
Example: {type:'modal', target:'webui', id:'modalpanel', content:{title:'S26', id:'confirm_modal',style:'question',bt1Txt:'S27', response1:'yes',bt2Txt:'S28', response2:'cancel', text:'S30',hideclose:true}}
type is modal (mandatory)
target is webui (mandatory)
id is modalpanel (optional)
content is modal deescription:
- title of the modal (mandatory),
S26 will be translated as Please Confirm
- id is modal id (mandatory), here
confirmation_modal
- style is modal style (mandatory), for confirmation modal it is
question,
- bt1Txt is the text to show on button 1 (optional), here
S27 will be translated as Yes, if not defined button won’t be displayed
- response1 is the message sent if button 1 is clicked (optional), here
yes, the click close the modal
- bt2Txt is the text to show on button 2 (optional), here
S28 will be translated as Cancel, if not defined button won’t be displayed
- response2 is the message sent if button 2 is clicked (optional), here
cancel, the click close the modal
- hideclose if set and true it will hide the cross button to close the modal (optional)
- overlay if set and true it will automatically close modal if modal loose focus (optional)
- text display the text in moda (optional), here
S30 will be translated asDo you want to update?
Note: close button and overlay feature won’t send any notification when modal is closed, be aware of it
-
Answer format: check the eventMsg.data
{
    "type": "modal",
    "content": {
        "response": "yes",
        "initiator": {
                        type:'modal',
                        target:'webui',
                        id:'modalpanel',
                        content : {
                                    "title":"S26",
                                    "id":"confirmation_modal",
                                    "style":"question",
                                    "bt1Txt":"S27",
                                    "response1":"yes",
                                    "bt2Txt":"S28",
                                    "response2":"cancel",
                                    "text":"S30",
                                    "hideclose":true
                                  }
                     }
    },
    "id": "modalpanel"
}
type is modal
id is the id set in command message to help to screen
content has the response it self response, in our case yes because user clicked on button 1, and also the initiator is the initial command for reference
-
Input modal
Example: {type:'modal', target:'webui', id:'modalpanel', content:{title:'S90', id:'input_modal',style:'input',bt1Txt:'S106', response1:'create',bt2Txt:'S28', response2:'cancel', text:'S104',hideclose:true}}
type is modal (mandatory)
target is webui (mandatory)
id is modalpanel (optional)
content is modal deescription:
- title of the modal (mandatory),
S90 will be translated as Create Directory
- id is modal id (mandatory), here
inputmodal
- style is modal style (mandatory), for input modal it is
input,
- bt1Txt is the text to show on button 1 (optional), here
S106 will be translated as Create, if not defined button won’t be displayed
- response1 is the message sent if button 1 is clicked (optional), here
create, the click close the modal
- bt2Txt is the text to show on button 2 (optional), here
S28 will be translated as Cancel, if not defined button won’t be displayed
- response2 is the message sent if button 2 is clicked (optional), here
cancel, the click close the modal
- hideclose if set and true it will hide the cross button to close the modal (optional)
- overlay if set and true it will automatically close modal if modal loose focus (optional)
- text display the text in moda (optional), here
S104 will be translated asPlease type directory name
Note: close button and overlay feature won’t send any notification when modal is closed, be aware of it
-
Answer format: check the eventMsg.data
{
    "type": "modal",
    "content": {
        "response": "create",
        "inputData": "mydir"
        "initiator": {
                        type:'modal',
                        target:'webui',
                        id:'modalpanel',
                        content : {
                                    "title":"S90",
                                    "id":"input_modal",
                                    "style":"input",
                                    "bt1Txt":"S106",
                                    "response1":"create",
                                    "bt2Txt":"S28",
                                    "response2":"cancel",
                                    "text":"S104",
                                    "hideclose":true
                                  }
                     }
    },
    "id": "modalpanel"
}
type is modal
id is the id set in command message to help to screen
content has the response it self response, in our case create because user clicked on button 1, and the text entered is in inputData, here mydir, and also the initiator is the initial command for reference
Note: inputData is present for both buttons clicked, so screening must be done according response
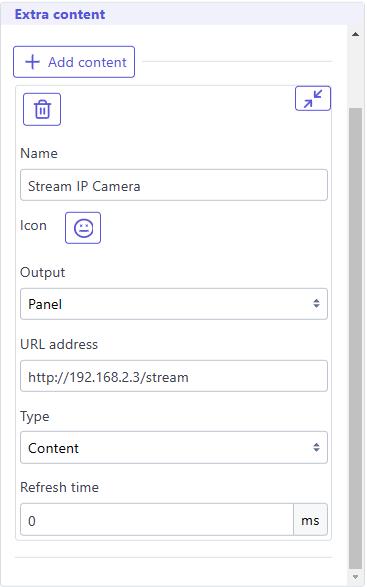
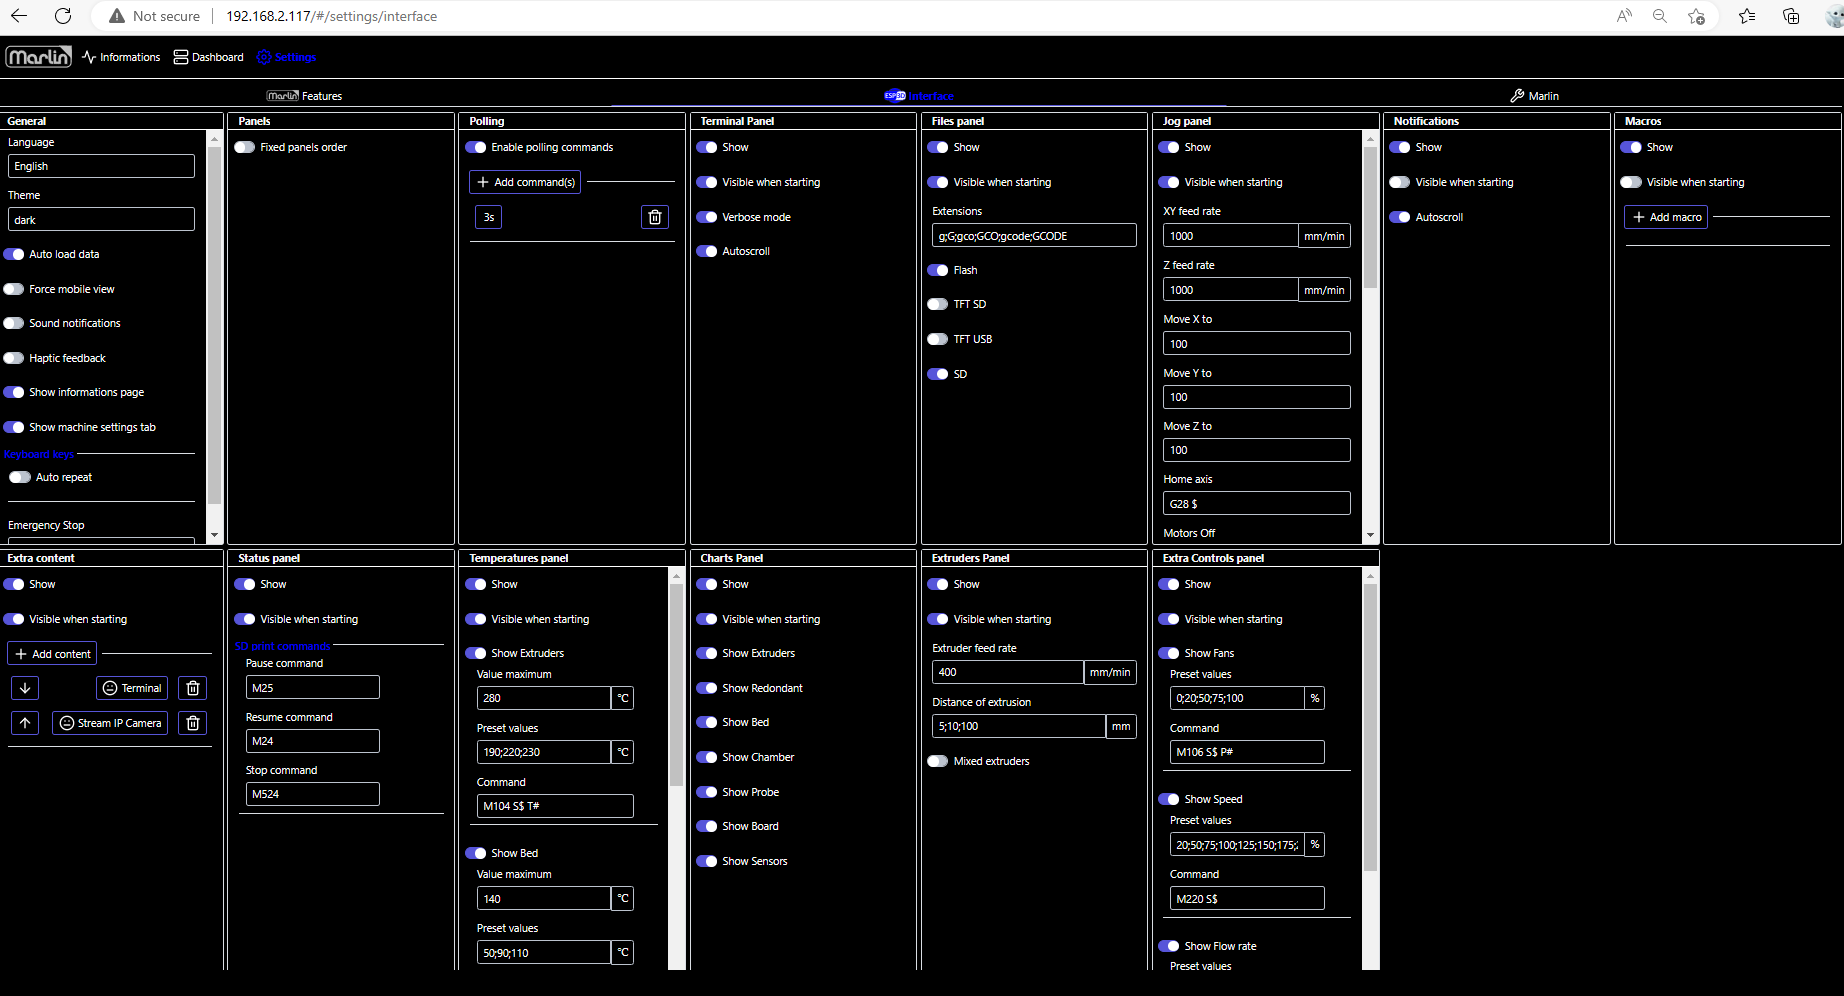
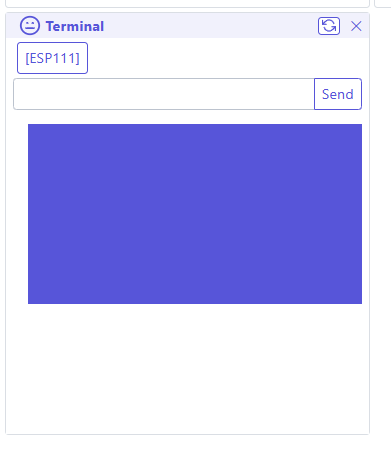
Install an extension in Web UI
Upload it to local filesystem or any path available to web server
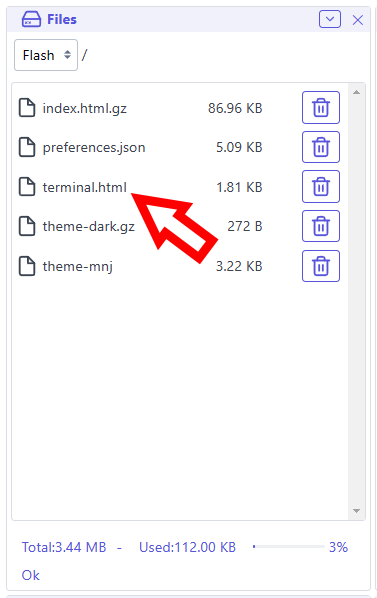
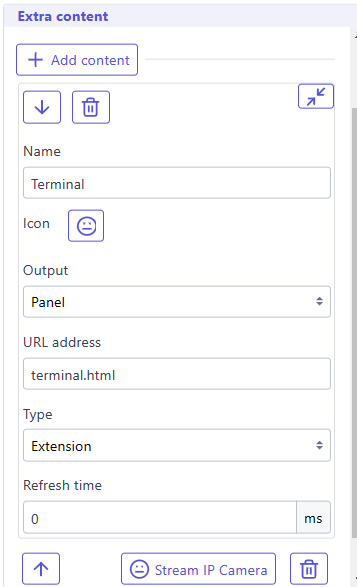
It will be displayed according your settings
Sample codes